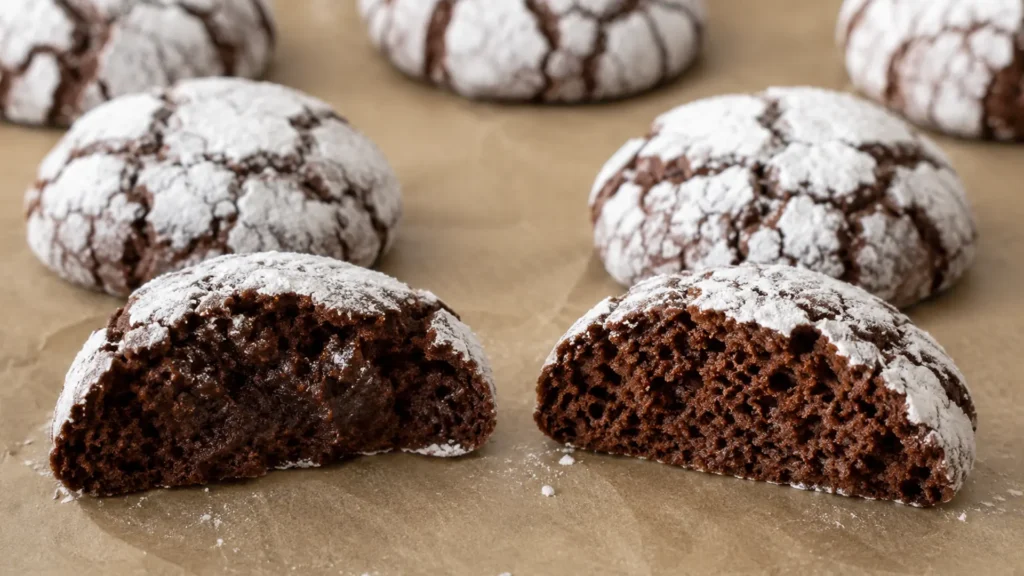
Red velvet cookies take the mild-cocoa, slightly tangy flavor of red velvet cake and pack it into a soft, chewy cookie, usually with a deep red crumb and a cream cheese finish. The good ones are tender in the center, hold their color through baking, and carry a real buttermilk tang instead of just being chocolate cookies wearing food dye. The disappointing ones bake up dull brown, spread flat, or taste like nothing but sugar. This guide explains what red velvet flavor actually is, how to get a true red that survives the oven, how to control the texture, and how to finish them with cream cheese frosting that pipes clean.
You do not need a cake mix and you do not need a long chill. What you need is the right ratio of cocoa to acid, the right kind of food coloring, and an eye for pulling the cookies before the centers fully set. Get those three right and these become one of the easiest crowd-pleasers in the holiday rotation, as reliable as any classic on a Christmas cookie tray.
What red velvet flavor actually is
Red velvet is not a chocolate flavor, even though it contains cocoa. The defining taste is a small amount of cocoa powder balanced against an acidic tang, traditionally from buttermilk and a little vinegar, with vanilla rounding it out. The cocoa is there for a whisper of chocolate and a mahogany base color, not to dominate. The acid is what makes red velvet taste like red velvet rather than like a weak chocolate cookie.
There is history baked into that combination. Before modern cocoa processing, the natural cocoa reacting with acidic buttermilk produced a reddish tint, which is where the red color originally came from. Today the cocoa is usually milder and the red comes from food coloring, but the cocoa-plus-acid flavor is still the heart of it. If you skip the buttermilk or the vinegar entirely, you lose the tang and the cookie reads as a plain chocolate cookie that happens to be red.
The cocoa to use
Use natural (non-alkalized) cocoa powder, not Dutch-process. Natural cocoa is acidic, which supports both the classic flavor and the reaction with baking soda for lift. Dutch-process cocoa is alkalized, which mutes the tang and shifts the color browner. A small amount goes a long way here, usually two to three tablespoons for a standard batch. More than that and you are making chocolate cookies. If you want a deeper look at how natural and Dutch cocoa behave differently in baking, the test kitchen at America’s Test Kitchen has documented the acid and color differences in detail.
Getting a true red that survives the oven
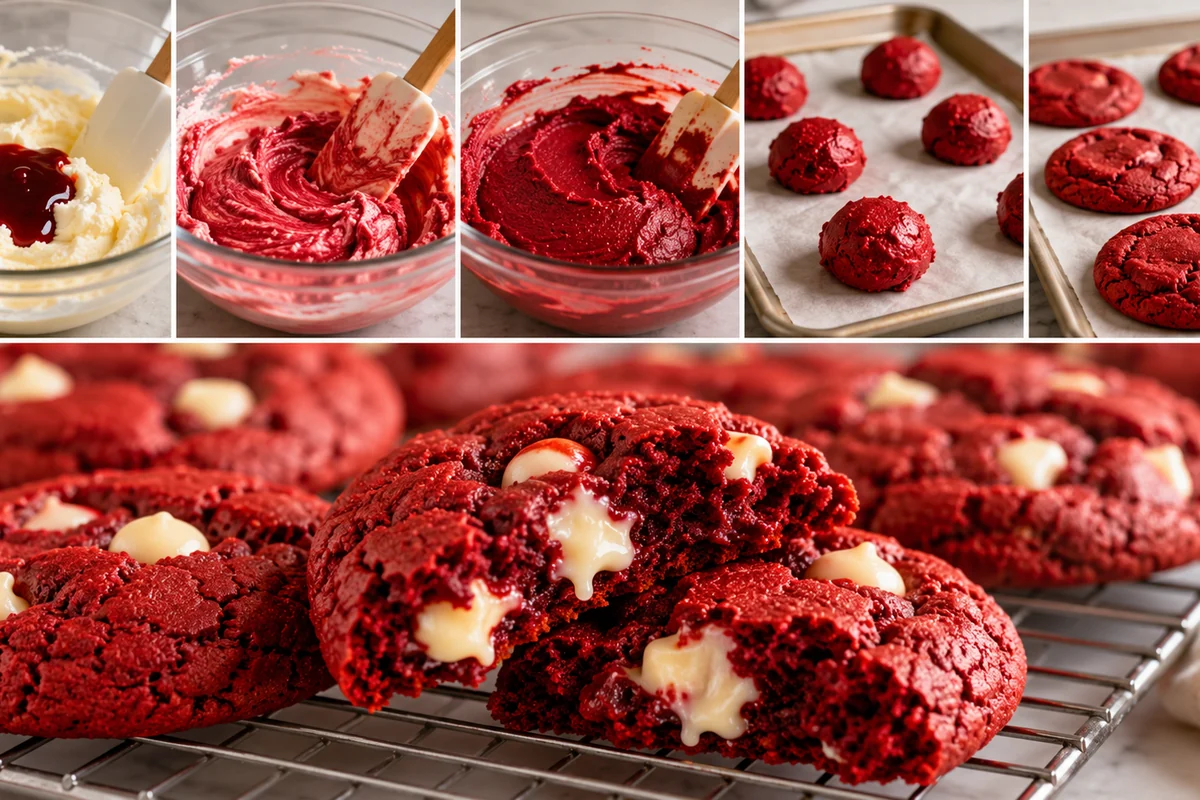
The biggest letdown with homemade red velvet cookies is dull color. Cocoa is brown, and baking deepens and dulls dyes, so a timid amount of coloring bakes out to a muddy maroon. To land a clean red you have to choose the right colorant and use enough of it. This chart compares the common options.
| Colorant | Amount (1 batch) | Result | Notes |
|---|---|---|---|
| Gel food coloring | 1 to 1.5 tsp | Deep, true red | Best choice; concentrated, does not thin the dough |
| Liquid food coloring | 1 to 2 tbsp | Lighter red, can dull | Adds moisture; you need a lot, which can soften the dough |
| Beet powder (natural) | 2 to 3 tsp | Earthy red-pink | Heat-sensitive; color fades in the oven, flavor is mild |
| No colorant | — | Natural mahogany brown | Tastes the same; just not red |
Gel coloring is the reliable pick. It is concentrated, so a teaspoon or so gives a strong red without watering down the dough the way liquid dye does. Add the coloring to the wet ingredients (the creamed butter, sugar, and egg) so it distributes evenly before the flour goes in. If you want to avoid artificial dye, beet powder gives a softer, earthier color but fades in the heat, so accept a muted result rather than fighting it.
Why baking dulls the color
Two things work against your red in the oven. First, the cocoa powder is brown and mixes its color into the dough, so any red has to be strong enough to read over a brown base. Second, heat degrades food dye slightly, so a color that looks bold in the raw dough always bakes a shade or two deeper and duller. That is why you aim for a raw dough that looks almost too red. The bake pulls it back to the shade you actually want. Bakers who under-color the dough hoping it will be enough are the ones who end up with maroon cookies. Start bolder than feels right and you will land in the right place.
Ingredients and what each one does
Here is a standard from-scratch batch and the job each component is doing. No cake mix, no chilling required.
| Ingredient | Amount | What it does |
|---|---|---|
| Unsalted butter, softened | 1/2 cup | Flavor and tenderness; softened for proper creaming |
| Brown sugar | 1/2 cup | Moisture and chew |
| Granulated sugar | 1/2 cup | Structure and crisp edges |
| Egg | 1 large | Binding and lift |
| Buttermilk or vinegar | 1 tbsp buttermilk or 1 tsp vinegar | The signature tang and reaction with soda |
| Vanilla extract | 1 tsp | Rounds out the flavor |
| Gel red food coloring | 1 to 1.5 tsp | The color |
| All-purpose flour | 1 1/2 cups | Structure |
| Natural cocoa powder | 2 to 3 tbsp | Mild chocolate note and base color |
| Baking soda | 1/2 tsp | Lift; reacts with the acid |
| Salt | 1/4 tsp | Balances sweetness |
| White chocolate chips (optional) | 1/2 cup | Sweet contrast to the tang |
White chocolate chips are the classic mix-in because their sweetness plays off the buttermilk tang, but you can leave them out or swap in semisweet. If you want chocolate chips throughout, the method is the same as Sally’s reliable take on red velvet chocolate chip cookies, which is a good reference for the chip-loaded variant.
A word on the sugars, because the brown-to-white ratio is doing real work. Brown sugar holds moisture and keeps the centers soft and chewy, while granulated sugar promotes spread and crisp edges. The half-and-half split above gives a soft cookie with enough edge definition to look finished. If you push toward all brown sugar you get a softer, puffier cookie that holds its shape; toward all granulated and you get a flatter, crisper one. Neither is wrong, but knowing which sugar drives which trait lets you tune the texture without changing anything else in the recipe.
Step by step
1. Cream and color
Beat the softened butter with both sugars until creamy, about two minutes. Add the egg, vanilla, buttermilk or vinegar, and the gel coloring, and beat until the dough is evenly red. Doing the coloring now, in the wet mix, gives you uniform color without streaks.
2. Add the dry ingredients
Whisk the flour, cocoa, baking soda, and salt in a separate bowl, then add to the wet mixture and stir just until no dry streaks remain. Overmixing develops gluten and makes the cookies tough, so stop early. Fold in the white chocolate chips if using.
3. Scoop and bake
Scoop into balls (about two tablespoons each) and space them on a lined sheet. Bake at 350 F (175 C) for 10 to 12 minutes, until the edges are set but the centers still look slightly underdone. Pull them then. They finish setting on the hot sheet, which is how you keep the centers soft and chewy.
4. Cool, then frost
Let the cookies rest on the sheet for five minutes, then move them to a rack to cool completely before frosting. Warm cookies melt cream cheese frosting into a slick puddle, so patience here is the difference between a clean swirl and a mess.
Texture: soft and chewy versus crisp
You can steer red velvet cookies toward two textures with small changes. For soft and chewy, lean on brown sugar, pull them slightly underbaked, and do not flatten the dough balls. For thin and crisp, use more granulated sugar, press the dough down before baking, and bake a minute or two longer until the edges deepen.
The most common texture complaint is flat, greasy spreading, which is almost always a butter-temperature problem rather than a recipe problem. If your cookies spread into thin discs, the fixes are the same ones in our guide on why cookies turn out flat: use softened, not melted, butter and chill the dough for 20 minutes if your kitchen is warm.
Doneness timing is the other lever that decides texture, and it is the one most people get wrong. These cookies look underdone in the center when they are actually ready to come out. The carryover heat in the cookie and the hot sheet pan finishes the center as it cools, so a cookie that looks set all the way through at the moment you pull it has gone a step too far and will firm up dry. Trust the edges: when the rim is set and the very middle still looks soft and slightly glossy, that is your cue. Setting a timer for the low end of the range and checking early saves more batches than any ingredient swap.
Cream cheese frosting and other finishes
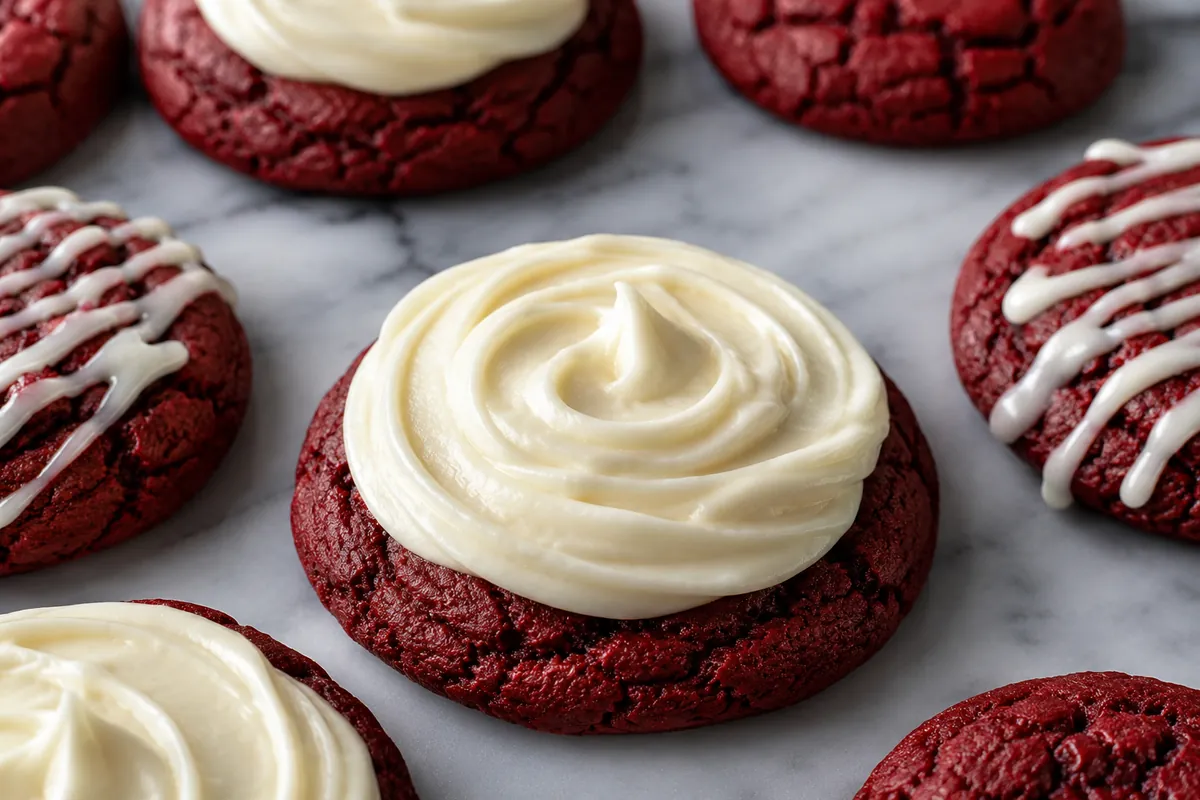
Cream cheese frosting is the traditional partner because its tang echoes the buttermilk in the cookie. For a pipeable frosting, beat softened cream cheese and butter until smooth, then add powdered sugar and a little vanilla until it holds a soft peak. If it is too runny to pipe, add more powdered sugar a few tablespoons at a time or chill it briefly to firm up. The frosting guides at King Arthur Baking are a reliable reference for ratios that pipe cleanly.
The most common cream cheese frosting failure is a frosting that will not hold its shape, and it usually traces to temperature, not the recipe. Cream cheese and butter that are too warm beat up loose and soupy, and no amount of powdered sugar fixes that without making the frosting cloyingly sweet. The reliable approach is to start with cream cheese and butter that are cool but not cold, beat them only until smooth, and stop. Then add powdered sugar gradually. If the kitchen is warm and the frosting slackens while you work, slide the bowl into the refrigerator for ten minutes and it will tighten right back up. Pipe onto fully cooled cookies, because even a slightly warm cookie will melt the first swirl into a slick.
| Finish | How | Best for |
|---|---|---|
| Frosted on top | Pipe or spread a swirl after cooling | Classic look, holiday plates |
| Cream cheese filled | Sandwich two cookies with frosting | A dessert-forward, richer treat |
| White chocolate drizzle | Melt and drizzle over cooled cookies | Less sweet, cleaner to transport |
| Powdered sugar dusted | Sift over the tops | Quick, no-frosting option |
If you are stacking these on a gift plate next to sugar cookies and other classics, the white chocolate drizzle travels best because it sets firm and does not smear the way cream cheese frosting can in a warm car.
Make-ahead, storage, and freezing
Unfrosted red velvet cookies keep in an airtight container at room temperature for about four to five days. Once frosted with cream cheese frosting, refrigerate them, because cream cheese is perishable, and bring them back to room temperature before serving so the frosting softens.
The dough freezes well. Scoop it into balls, freeze on a tray until solid, then bag them and bake from frozen, adding a couple of minutes to the time. Baked, unfrosted cookies also freeze for up to three months. Frost only after thawing. For the general rules on what holds up in the freezer, our notes on freezing cookie dough apply directly here.
Troubleshooting red velvet cookies
| Problem | Likely cause | Fix |
|---|---|---|
| Dull or brown color | Too little coloring or Dutch cocoa | Use more gel color; switch to natural cocoa |
| Cookies spread flat | Melted or too-soft butter | Use softened butter; chill dough 20 min |
| Dry, crumbly texture | Too much flour or overbaked | Weigh flour; pull when centers look underdone |
| No red velvet tang | Skipped the acid | Add buttermilk or 1 tsp vinegar |
| Frosting runs off | Cookies still warm or frosting too thin | Cool fully; add powdered sugar to thicken |
| Tough, dense cookies | Overmixed after adding flour | Stir only until no dry streaks remain |
If the flavor falls flat, the culprit is almost always the missing acid. A teaspoon of vinegar or a tablespoon of buttermilk is what turns a red chocolate cookie into a red velvet cookie. The vinegar taste bakes out completely and leaves only the gentle tang behind, so do not skip it for fear of a sour note.
Variations
Red velvet is a forgiving base for swaps. Fold in white chocolate chips for the classic version, semisweet for more chocolate, or chopped pecans for crunch. Roll the dough balls in powdered sugar before baking for a crinkle-style crackled top. You can also press the dough into a pan and bake it as bars, then frost and cut into squares for an easy potluck format. For another buttery, color-forward holiday option to bake alongside these, our chocolate chip cookie guide covers the texture fundamentals that carry over to almost any drop cookie.
Frequently asked questions
What gives red velvet cookies their flavor?
A small amount of natural cocoa powder plus an acidic tang from buttermilk or vinegar, rounded out with vanilla. The cocoa is mild on purpose; the acid is what makes the flavor read as red velvet rather than as a plain chocolate cookie.
Can I make red velvet cookies without food coloring?
Yes, but they will be a natural mahogany brown rather than red. The flavor is identical. If you want red without artificial dye, beet powder gives a softer, earthier color, though it fades in the oven heat and will not be as bright as gel coloring.
Should I use gel or liquid food coloring?
Gel. It is concentrated, so a teaspoon or so delivers a deep red without thinning the dough. Liquid coloring requires much more to get the same shade, and that extra liquid softens the dough and can make the cookies spread.
Why did my red velvet cookies turn brown?
Either you used too little coloring or you used Dutch-process cocoa, which is darker and dulls the red. Use natural cocoa and enough gel color, and add the color to the wet ingredients so it distributes fully before baking.
Do red velvet cookies need to be refrigerated?
Unfrosted cookies are fine at room temperature for several days. Once you add cream cheese frosting, refrigerate them, since cream cheese is perishable. Let them come back to room temperature before serving so the frosting softens and the cookie tastes its best.
Can I freeze red velvet cookie dough?
Yes. Scoop the dough into balls, freeze them solid on a tray, then transfer to a bag and bake from frozen, adding a minute or two. Baked, unfrosted cookies freeze for up to three months. Frost only after thawing.
Bottom line
Great red velvet cookies come down to three decisions. Use natural cocoa with a real hit of acid so they actually taste like red velvet, reach for gel coloring and use enough of it so the red survives the oven, and pull the cookies while the centers still look underdone so they stay soft and chewy. Finish with cream cheese frosting if you want the classic, or a white chocolate drizzle if they need to travel. Get the cocoa, the acid, and the color right, and the rest is just deciding how to dress them up.