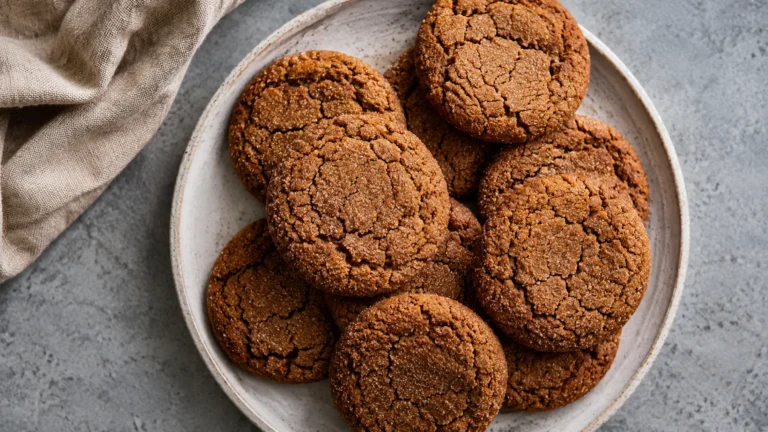
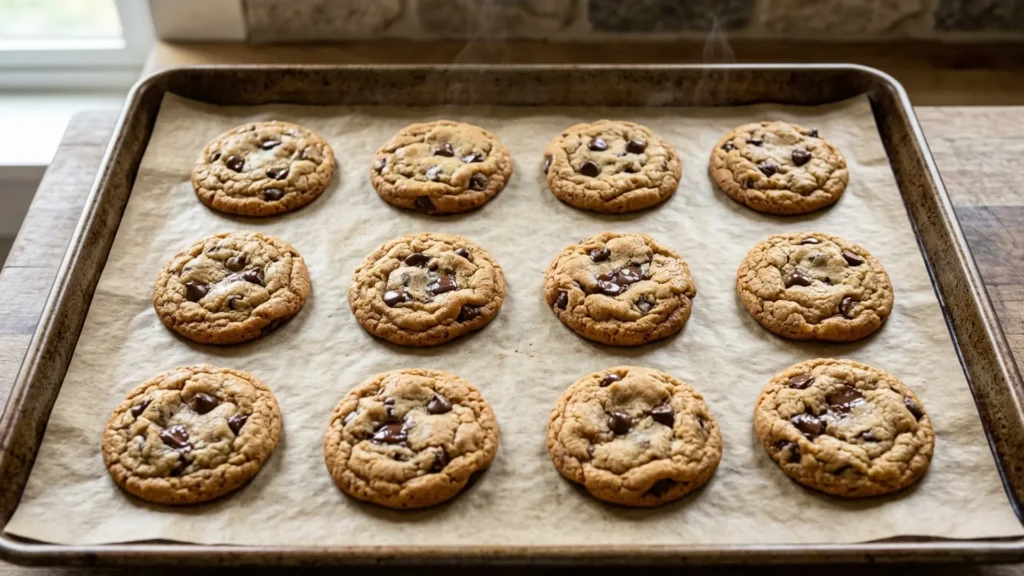
What temp to bake cookies comes down to one honest answer: 350 degrees Fahrenheit is the safe default, but it is rarely the best temperature for the cookie you actually want. Bake at 325F for soft and chewy, 350F for the classic middle, and 375F for crisp edges. If your cookies spread into one sad puddle, the fix is often a hotter oven, not a colder one.
Whatever gets baked on a sheet pan, the temperature dial is the single most misunderstood knob in cookie baking. Most home recipes default to 350F because it forgives a lot. It also flattens a lot. Below is exactly which temperature to choose, why the food-science research now points higher than 350F, and how to read your own oven so the number on the dial matches the number inside the box.
The Short Answer, Then the Real Answer
Set the oven to 350F and you will get an acceptable cookie almost every time. That is why nearly every recipe card prints it. But “acceptable” and “what you pictured” are not the same thing.
Here is the part most guides skip. A 2024 study published in the Journal of Food Science compared 365F, 401F, and 437F at 12 minutes each. The cookies came out genuinely right only at 401F: lower left them underdone and damp, higher dried them out. An earlier paper in the Journal of Food Science and Technology compared 262F, 374F, and 482F and found 374F at 16 minutes produced the best texture and the least sad spreading. So the peer-reviewed lab work says the sweet spot lives between roughly 374F and 401F, meaningfully higher than the gospel 350F. In that range, the 375F to 400F batches stand taller and brown more evenly.
So why does 350F survive? Because most home recipes were written for thin, cheap sheet pans and rooms where the dough sits out too long. At 350F that overspreading is slow enough to forgive. Crank a thin pan of warm dough to 400F and you can scorch the bottoms before the centers set. The right number is a conversation between your oven, your pan, and your dough, not a fixed law.
Choose Your Temperature by the Texture You Want
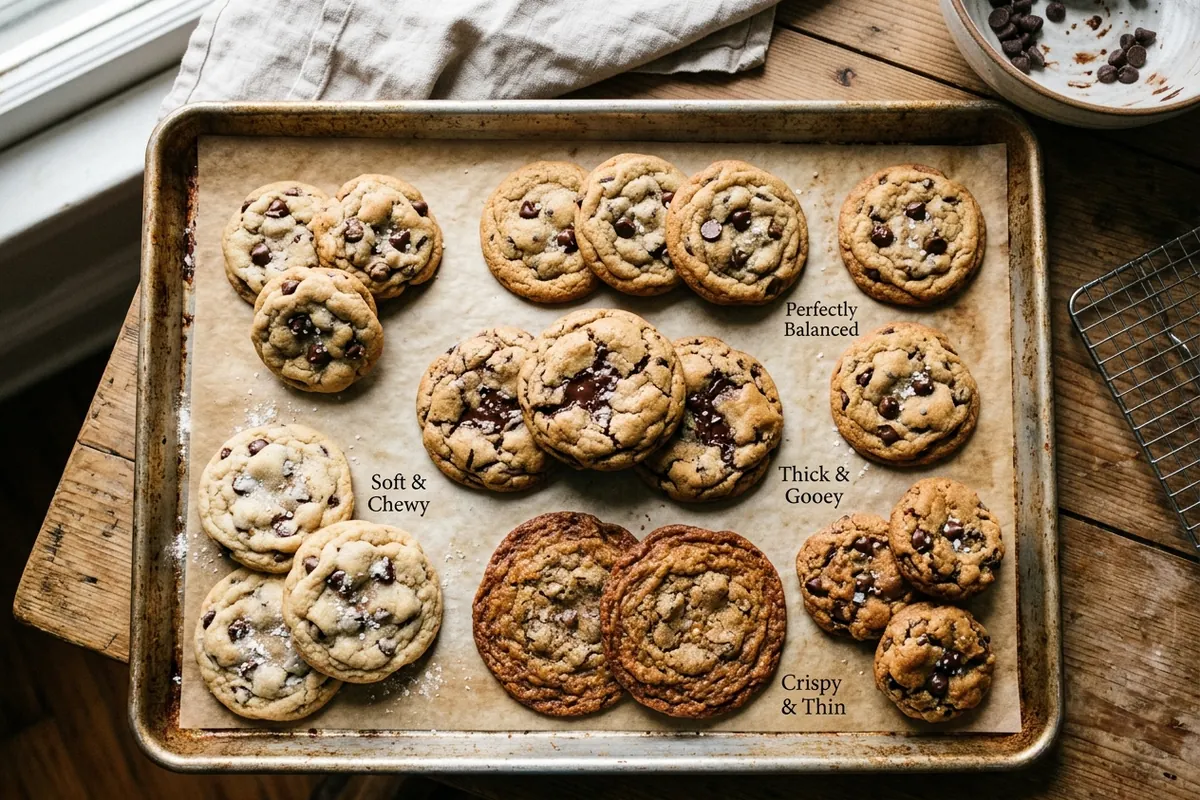
Stop asking “what temp to bake cookies” as if there were one answer. Ask what you want the cookie to do. The temperature is the lever that controls how fast the edges set against how long the center stays molten and spreads.
| Temperature | Result | Best for | Typical time |
|---|---|---|---|
| 325F | Soft, thick, chewy; slow even bake | Thick chocolate chip, stuffed cookies, big bakery-style domes | 13-16 min |
| 350F | Balanced; golden edge, soft middle | Everyday drop cookies, the all-purpose default | 10-12 min |
| 375F | Crisp edges, lacy spread, snappy bite | Thin chocolate chip, tuiles, oatmeal lace, sugar cookies you want crisp | 8-11 min |
| 400F | Fast set, tall shape, browned top | Cookies that hold their shape; the research sweet spot for many drop doughs | 9-11 min |
Notice the pattern. Lower temperature buys you time for the dough to spread and stay tender. Higher temperature sets the edges fast and keeps the cookie tall. If your problem is a flat, greasy spread, going up to 375F or even 400F often saves the batch better than any amount of chilling.
If you want the cheat sheet by cookie type instead of by texture, here is how to set the dial for the most common cookies:
| Cookie type | My temperature | Time |
|---|---|---|
| Classic chocolate chip | 350F | 10-12 min |
| Thick bakery-style chocolate chip | 325F | 14-16 min |
| Sugar cookies (soft) | 350F | 9-11 min |
| Sugar cookies (crisp cutouts) | 375F | 8-10 min |
| Oatmeal | 350F | 11-13 min |
| Peanut butter | 350F | 9-11 min |
| Shortbread and butter cookies | 325F | 15-18 min |
| Snickerdoodles | 375F | 9-11 min |
| Gingersnaps (crisp) | 375F | 10-12 min |
The fat and sugar ratio changes the math
Two doughs at the same temperature can behave like strangers. A butter-heavy, white-sugar-heavy dough spreads fast and crisps, so it likes a hotter, shorter bake to lock the shape before it runs. A dough leaning on brown sugar, egg, and a touch more flour holds moisture and stays chewy, so it tolerates the slower 325F to 350F range. When sugar is cut in a recipe, like in these low sugar oatmeal cookies, the dough browns slower because there is less sugar to caramelize, so nudging the oven up about 15F gives the same edge color.
Your Oven Is Lying to You (And How to Catch It)
Here is the truth nobody on a recipe card will tell you. The number you set is not the number inside the oven. Home ovens routinely run 25F to 50F off, and they swing as the element cycles on and off. “Flat, raw-centered” cookies are often an oven problem, and a $7 oven thermometer on the middle rack is the quickest way to confirm it. My oven was running 30F cold. Every recipe in the house had been baking at the wrong temperature for years.
Buy a standalone oven thermometer. Set the oven to 350F, let it fully preheat for at least 15 minutes, and read the real number. If it says 320F, your oven runs 30F cold and you compensate by setting it to 380F. This one $7 fix solves more cookie problems than any fancy ingredient swap.
The test cookie protocol
Before you commit a full tray, bake one. Scoop a single cookie, bake it at your chosen temperature, and watch it like a hawk. If it spreads too thin, drop 25F or chill the dough harder. If it stays pale and domed, go up 25F. This one-cookie calibration costs you four minutes and saves you a ruined dozen. America’s Test Kitchen has long preached this kind of single-variable testing, and it works because it isolates the oven from the dough. You can read more of their methodical approach at America’s Test Kitchen.
Convection, Dark Pans, and Other Heat Multipliers
The temperature you choose is only half the story. What the heat travels through matters just as much, and the top-3 guides barely mention it.
Convection ovens move hot air with a fan, which bakes faster and hotter at the same dial setting. The standard rule is to drop the temperature 25F when using convection. So a 375F crisp-cookie recipe becomes 350F on convection. Skip that adjustment and your edges brown before the centers cook.
Pan color is the sneaky one. Dark, nonstick sheet pans absorb more radiant heat and run the bottoms hotter, so they brown and sometimes burn the undersides. If you only own dark pans, drop your temperature 15F to 25F or double up two pans to slow the bottom heat. Light, heavy aluminum pans give the most even bake and are the first choice. Parchment paper, not greasing, also keeps bottoms from frying.
| Variable | Effect on heat | Adjustment |
|---|---|---|
| Convection fan on | Bakes hotter and faster | Lower set temp 25F |
| Dark nonstick pan | Hotter bottoms, risk of burning | Lower 15-25F or double-pan |
| Glass or stoneware | Holds heat, browns slow then fast | Watch the last 2 minutes closely |
| Warm dough out of a hot kitchen | Spreads before it sets | Chill 30 min or raise temp 15F |
Troubleshooting: Match the Symptom to the Temperature Fix
This is the table most other guides leave out. Read your cookie, then fix the heat.
| What you see | Likely cause | The fix |
|---|---|---|
| Flat, greasy, spread thin | Oven too cool; dough too warm | Raise to 375-400F, chill dough 30 min |
| Raw or gummy center, done edges | Oven runs hot, edges set too fast | Lower 25F, bake a minute or two longer |
| Burnt bottoms, pale tops | Dark pan or rack too low | Move to center rack, lower 15F, use parchment |
| Pale and domed, never browns | Oven runs cold | Verify with thermometer, raise set temp |
| Cracked tops, dry crumb | Too hot or overbaked | Lower 25F, pull when edges just set |
The single most useful habit: pull cookies when the edges are set and the centers still look slightly underdone. They carry over and finish on the hot pan. A cookie that looks fully done in the oven is usually overbaked by the time it cools. Most drop cookies come out at the 10 to 11 minute mark at 350F, even when they look like they need one more minute. That carryover bake is real, and it is what separates a chewy cookie from a hard one. The same patience pays off with sourdough-leaning doughs, like these sourdough discard chocolate chip cookies, where the extra moisture means the center sets a touch slower.
Special Cases: Frozen Dough, Big Cookies, and Bar Cookies
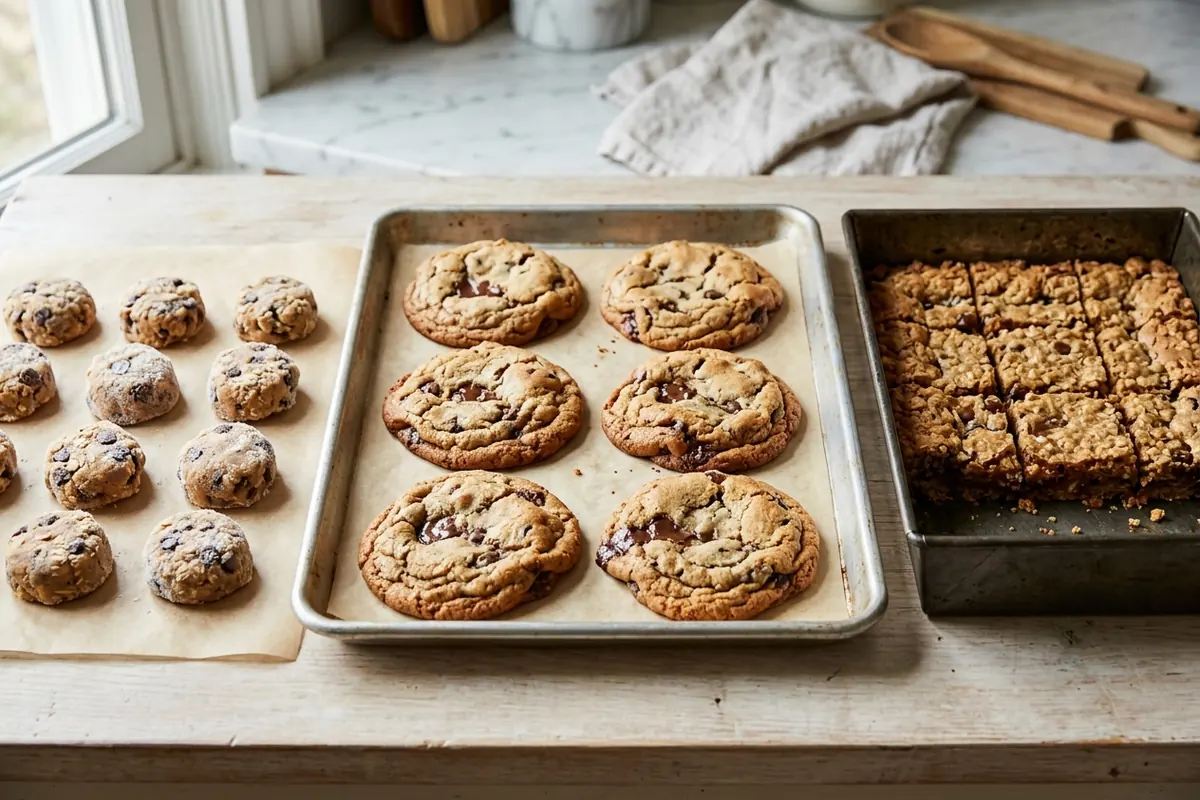
Frozen dough balls go straight into the oven, no thawing, but add 1 to 2 minutes and consider dropping the temperature 15F so the outside does not race ahead of the frozen middle. Giant bakery-style cookies, the four-ounce monsters, want a lower-and-slower 325F so the thick center cooks before the rim burns. Bar cookies and blondies behave like cake more than cookies and usually want 325F to 350F for a longer, gentler bake.
Thin, delicate cookies that should snap, like a crisp wafer or a lace cookie, want the heat high and the time short, 375F for 8 to 10 minutes, so the sugar caramelizes and the edges go brittle. For a deeper dive into texture-by-recipe, the team at Bon Appetit has thorough cookie method pieces worth a read, and the single-variable testing approach at Cook’s Illustrated is the gold standard for nailing down why a temperature change does what it does. And if you are baking gluten-free or with almond flour, the heat behaves differently again because those flours brown faster; keep a closer eye and consider dropping 15F, as with these almond meal chocolate chip cookies.
If you bake a lot of sheet desserts, the keto baking hub over at KetoDrip covers low-carb temperature quirks worth a glance, since almond and coconut flours change how heat sets a cookie.
Time and Temperature Are a Trade, Not Two Separate Dials
People treat oven temperature and bake time as two independent settings. They are not. They are a single trade. The same cookie can come out nearly identical at 325F for 15 minutes or at 375F for 9 minutes, but the journey to that finish changes the texture in ways worth understanding.
A longer, cooler bake gives the dough more time to spread before the structure sets. That builds a thinner, more even cookie with a tender, uniform crumb. A shorter, hotter bake slams the edges shut early, traps more height, and leaves a sharper contrast between a set rim and a gooey middle. So if you love that bakery look where the edge is crisp and the center is almost molten, lean hotter and shorter. If you want a flat, chewy, uniform cookie all the way across, lean cooler and longer.
Here is a practical rule. For every 25F you raise the temperature, cut roughly 1 to 2 minutes off the bake. For every 25F you drop, add 1 to 2 minutes. It is not perfectly linear, which is exactly why the test cookie matters, but it gets you in the right neighborhood on the first try instead of the third.
The two-rack rotation trick
When two sheets bake at once, the top and bottom racks never cook the same. The top rack browns the tops faster, the bottom rack browns the bottoms faster. So at the halfway mark, swap the pans top-to-bottom and spin each one front-to-back. That single rotation is the difference between twelve even cookies and a dozen where half are pale and half are scorched. If you can, though, bake one sheet at a time on the center rack. It is slower, but it is the most even position in any oven because it sits farthest from both heating elements.
Reading the Recipe Versus Reading the Cookie
A recipe gives you a starting point, not a guarantee. The author baked in their oven, with their pans, at their altitude, with their flour. Yours differ. So treat the printed temperature and time as a hypothesis you confirm with your eyes and nose.
Smell is an underrated timer. When you first catch the warm, toasty, buttery smell drifting out, the cookies are usually about 60 to 90 seconds from done. That is your cue to crouch at the oven window and watch. Look for set edges, a top that has lost its raw wet shine, and a center that still looks soft. The color on the bottom edge tells you the most: a light golden ring means perfect, deep brown means you went a touch far, and no color at all means the oven is running cold or you pulled too soon.
Different doughs hide their doneness differently. A pale sugar cookie barely changes color, so you watch the edges for the faintest gold. A molasses-rich dough is already dark, so you go by smell and by how the surface cracks and sets rather than by color. The pumpkin-forward dough in these pumpkin chocolate chip cookies holds a lot of moisture, which means the center stays cakey-looking longer than you expect, so trust the set edge over the soft middle and pull them before they feel firm.
Altitude and Humidity Quietly Change Everything
Two factors the top guides ignore entirely can wreck a perfectly chosen temperature. At high altitude, above roughly 3,000 feet, lower air pressure makes cookies spread more and set slower. The common fix is to raise the oven temperature 15F to 25F and shorten the time slightly, which sets the structure before the cookie runs flat. You may also need a touch more flour and a little less sugar and leavening.
Humidity matters too. Flour absorbs moisture from a damp kitchen, so on a humid day your dough can run wetter and spread more than the same recipe did last winter. If your cookies suddenly spread more than usual and nothing else changed, the weather is the suspect. Chill the dough longer or add a tablespoon or two of flour. None of this is exotic, but it explains the maddening days when a recipe you have made fifty times suddenly misbehaves.
Why This Matters
The temperature dial decides whether your cookie is chewy or crisp, tall or flat, golden or burnt, far more than any single ingredient. Once you stop treating 350F as a commandment and start matching the temperature to the texture you want, the pan, and your oven’s real reading, the guesswork falls away. Buy the thermometer, bake the test cookie, and pick your number on purpose. That is the whole game.
FAQ
Is 350 or 375 better for cookies?
It depends on the texture you want. Use 350F for a balanced cookie with a soft center and golden edge, the all-purpose choice. Use 375F when you want crisp, snappy edges and less spread, especially for thin chocolate chip or sugar cookies. Neither is wrong; they produce different cookies.
What temperature should I bake chocolate chip cookies at?
For classic chewy chocolate chip cookies, 350F for 10 to 12 minutes is the reliable choice. If you want them thicker and softer, drop to 325F and bake a few minutes longer. If you want crisp edges, go to 375F and pull them a minute sooner.
Why are my cookies flat even at 350F?
Usually the dough is too warm or the oven is running cool. Chill the dough 30 minutes, verify your oven temperature with a standalone thermometer, and try raising the heat to 375F. A hotter oven sets the edges before the cookie can spread into a puddle.
Can I bake cookies at a higher temperature to save time?
You can go up to about 400F, which recent food-science research found bakes many drop cookies better than 350F. But do not push past 401F or use high heat with dark pans and warm dough, or the bottoms will burn before the centers set.
Do I need to adjust temperature for convection?
Yes. Lower the set temperature by 25F when baking on convection, because the fan circulates hot air and bakes faster. A 375F conventional recipe becomes 350F on convection.
How do I know when cookies are done?
Pull them when the edges are set and the centers still look slightly underbaked. They finish cooking from carryover heat on the hot pan. If they look fully done in the oven, they are likely overbaked by the time they cool.
What temperature is best for frozen cookie dough?
Bake frozen dough balls without thawing, adding 1 to 2 minutes to the time. Consider dropping the temperature 15F below the recipe so the outside does not finish before the frozen center cooks through.