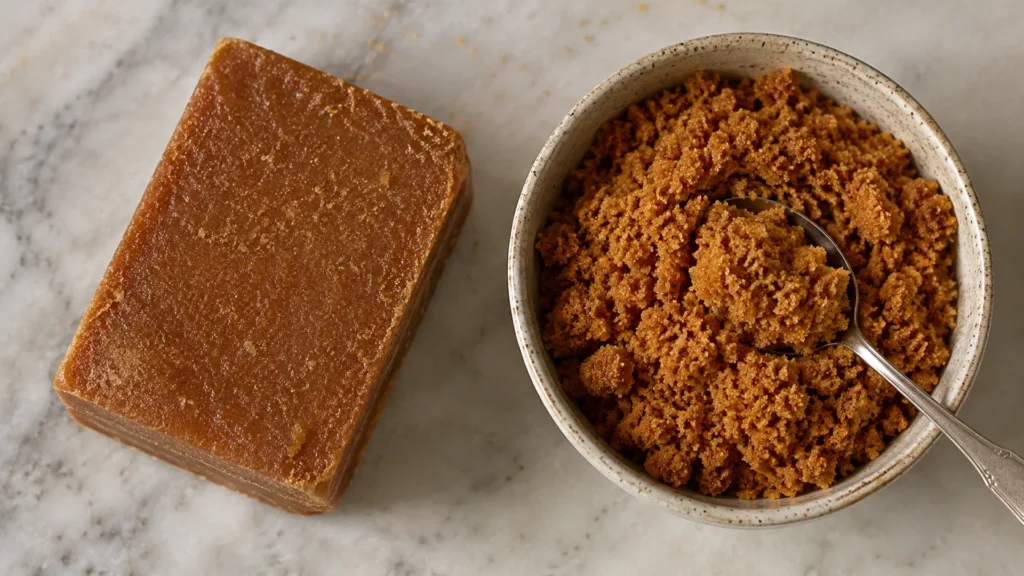
Knowing how to soften brown sugar turns a rock-hard brick at the back of the pantry into usable, scoopable sugar in anywhere from ten seconds to overnight, depending on which method you reach for. Brown sugar hardens for one simple reason: it dried out. The good news is that the same process that hardened it can be reversed by putting moisture back in. Below is every method worth knowing, from the 20-second microwave rescue to the slow overnight bread trick, plus the science of why it clumps and how to stop it from ever happening again.
Brown sugar is white sugar coated in a thin film of molasses, and that molasses is the whole story. Molasses holds water, which keeps the sugar moist and soft. When the package is left open or stored badly, the water in the molasses evaporates into the air. As it leaves, the sugar crystals lock together into a hard mass. The block is not spoiled and it is not ruined. It is just thirsty, and rehydrating it brings it right back.
So many cookies depend on brown sugar for moisture and chew that a hard brick in the pantry is a common problem. The method you choose should match the situation. If you are mid-recipe with a bowl already going, you want speed. If you just found a forgotten bag and you are not baking until the weekend, you want the slow, gentle approach that restores the sugar properly. Picking the wrong method for the moment is how people end up with a half-melted, sticky mess that is harder to use than the brick they started with. The sections below are organized that way, from fastest to gentlest, so you can jump to the one that fits.
Why Brown Sugar Hardens in the First Place
The clumping is pure physics. Each grain of brown sugar carries a coat of molasses, and molasses is hygroscopic, meaning it both holds and gives up moisture depending on the air around it. In a sealed bag the moisture stays put and the sugar stays soft. Open that bag in a dry kitchen and the water slowly migrates out into the room. As the molasses film dries, the sugar crystals that were sliding past each other start to bond at their contact points, and the whole mass fuses into a brick.
This is why your sugar feels fine in summer and turns to concrete in a dry winter kitchen with the heat running. Lower humidity pulls moisture out faster. It is also why a brand-new bag is soft and a half-used one left clipped but not sealed goes hard. The fix in every case is to reintroduce moisture so the molasses can soften and the crystals can release their grip. The basics of how this sugar-and-molasses coating behaves are covered in the reference on brown sugar, and the broader behavior of sugar crystals is explained in the overview of sugar.
The Fast Microwave Method
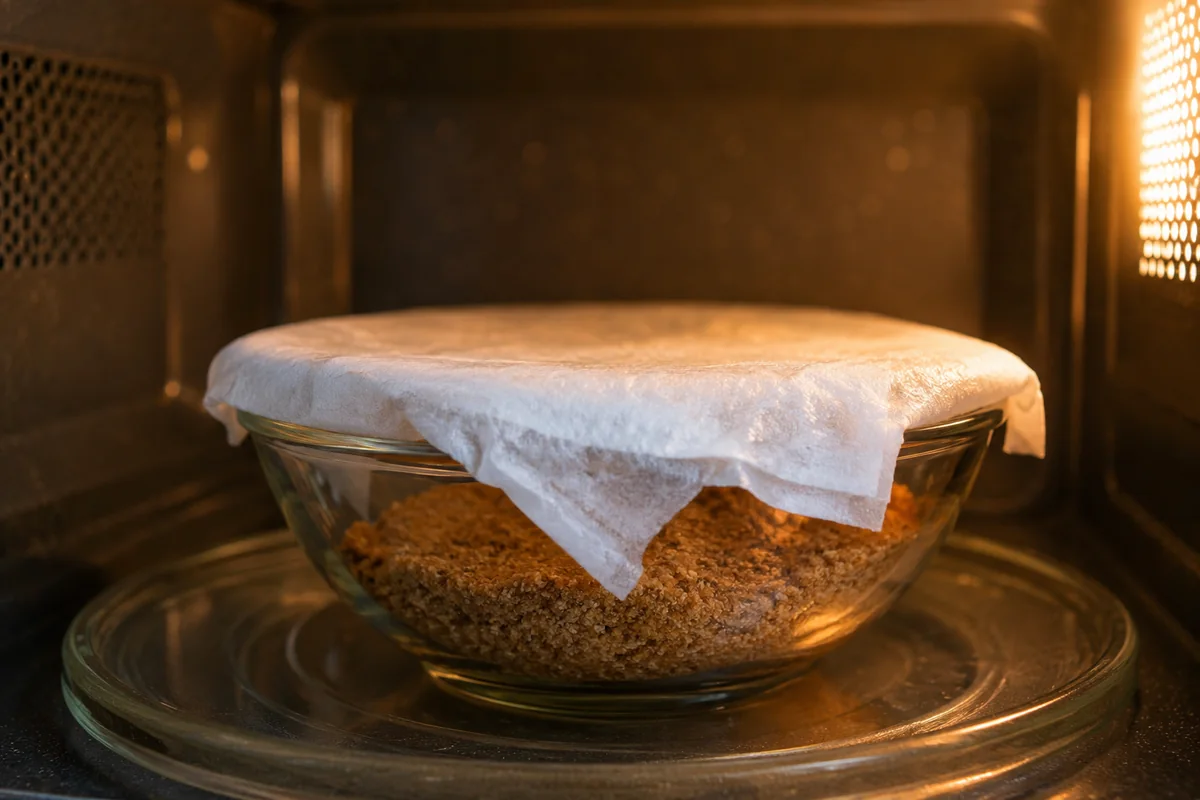
When you need soft sugar right now for a batch you are mixing this minute, the microwave is the fastest route. Put the hardened brown sugar in a microwave-safe bowl. Lay a damp paper towel over the top, or set a cup of water in the microwave alongside it. Heat in short bursts of 15 to 20 seconds, checking and breaking up the lump between each burst. The steam from the wet towel softens the molasses just enough to loosen the crystals.
The catch with the microwave is that it works by warming the sugar, so it softens while warm and can re-harden as it cools. Use it right away. If you microwave too long or skip the moisture, you will partly melt the sugar into a sticky, half-caramelized mess that is worse than the brick you started with. Short bursts and constant checking are the rule. This method is for immediate use, not for restoring a whole bag you want to keep soft for weeks.
| Method | Time | Best for |
|---|---|---|
| Microwave with damp towel | 20 to 60 seconds | Need soft sugar this minute; use immediately. |
| Oven on low heat | 5 minutes | A larger amount needed fast; watch closely. |
| Bread or apple slice, sealed | Overnight to 2 days | Restoring a full bag with no heat or melting. |
| Damp paper towel, sealed | Several hours to overnight | Gentle, hands-off, no extra ingredients. |
The Oven Method for Bigger Amounts
If you have more sugar than fits the microwave trick, the oven works. Put the hard sugar in an oven-safe dish and warm it at a low temperature, around 250 degrees Fahrenheit, for about five minutes. The gentle heat softens the molasses so you can break the block apart with a fork. Like the microwave, this softens while warm, so work the sugar loose immediately and use it before it cools and sets again.
Watch it the entire time. Brown sugar at the edges of the dish can scorch or start to caramelize if you leave it too long, and burnt sugar smells unmistakable. Pull it the moment a fork goes through. This method is best when you need a cup or two softened in a hurry for active baking, not for long-term storage. For that, you want one of the slow rehydration tricks below.
A small tip that makes the oven method safer: spread the sugar out rather than leaving it in a tight mound. A thin, even layer warms uniformly and softens in less time, which means less chance any single spot overheats. If you can, break the block into a few large chunks first so the heat reaches more surface at once. And keep the oven door cracked for a quick check every couple of minutes. Brown sugar goes from perfectly soft to scorched faster than you would expect, and unlike the microwave, you cannot smell trouble through a closed oven until it is too late.
The Slow, No-Heat Overnight Methods
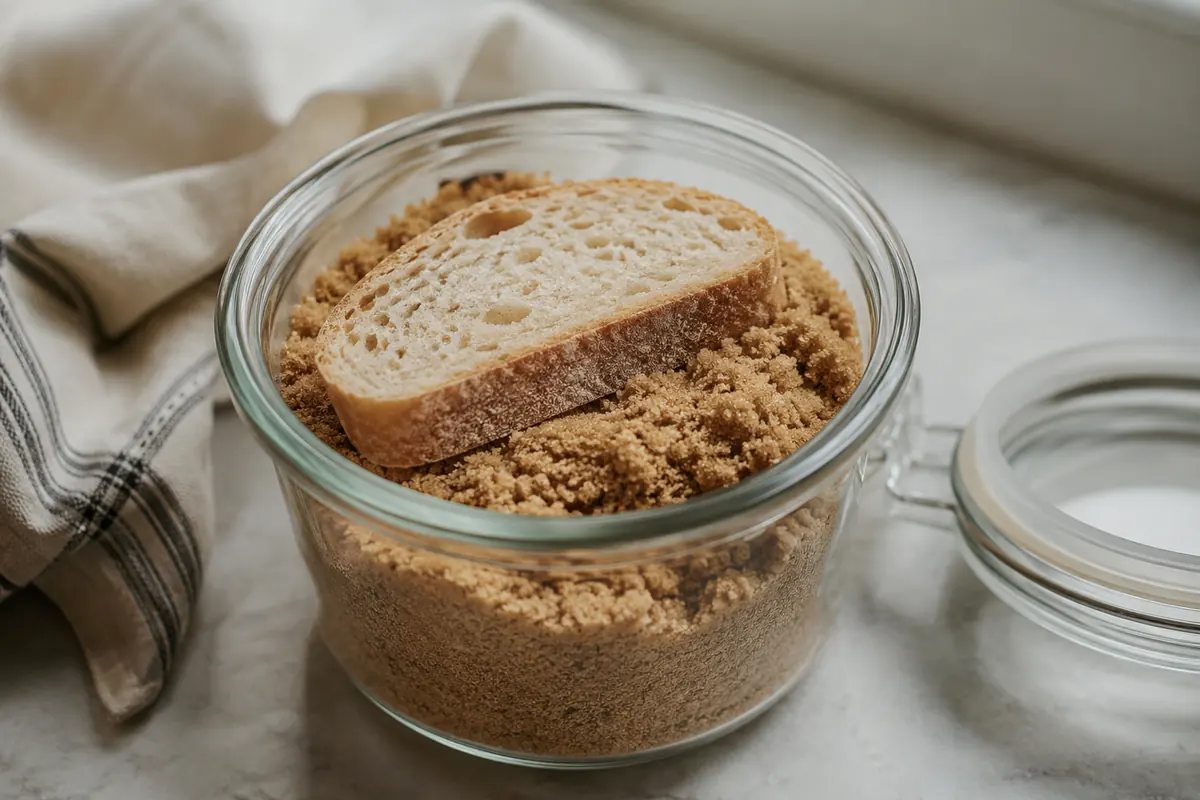
The gentlest and most reliable way to restore brown sugar adds moisture without any heat, so the sugar comes back soft and stays soft. Put the hard sugar in an airtight container and add a slice of fresh bread, a few apple slices, or a damp paper towel folded and set on top so it does not touch the sugar directly. Seal it and wait. Overnight is usually enough, and a stubborn brick may take a day or two. The moisture from the bread or apple slowly migrates into the sugar and rehydrates the molasses.
This is the method for a bag you want to keep, because it restores the sugar to its natural soft state rather than just warming it temporarily. Swap out the bread once it has dried and gone hard, which is the visible sign that its water moved into the sugar. The same moisture-holding principle is exactly what keeps a baked cookie tender for days, which is why these tricks help both for storage and for soft results, as explained in the guide on how to keep cookies soft.
A quick word on which moist item to use. Bread is the classic choice because a single slice carries plenty of water and gives it up slowly, but it can mold if you leave it in for more than a couple of days, so pull it once the sugar is soft. Apple slices work the same way and add a faint sweetness that is harmless in baking, though they too need removing before they spoil. A folded damp paper towel set on top of the sugar, not touching it directly, is the cleanest option because there is nothing to mold and nothing to remember to throw out. All three rely on the same slow transfer of water vapor inside a sealed space. The seal is the part people skip, and without it the moisture just escapes back into the room and nothing changes.
Patience is the only real cost here. The slow methods can take a full day or even two for a badly hardened brick, because water moves through packed sugar slowly. Resist the urge to speed it up by adding more moisture or popping it in the microwave halfway through. If you rush it, you get a soft outer layer over a still-hard core, or worse, a wet surface that clumps. Set it up before bed, forget about it, and check it in the morning. Most of the time the brick has loosened enough to break apart with a fork, and a few more hours finishes the job.
How Long Each Method Lasts
It is worth understanding that not all softening is equal. The microwave and oven methods soften the sugar with heat, which means they are temporary. The sugar is pliable while warm because the molasses has loosened, but as it cools the crystals can lock right back up, sometimes within an hour. That is fine when you are about to dump it into a mixing bowl, but useless if you want the bag to stay soft on the shelf. Heat methods are a rescue, not a cure.
The no-heat methods are different because they actually put water back into the sugar rather than just warming what is there. Once the molasses is rehydrated, the sugar stays soft as long as you keep it sealed away from dry air. That is the real fix. If you find yourself reaching for the microwave every single time you bake, the problem is your storage, not your sugar, and the bread-in-a-sealed-container approach followed by a proper airtight container will end the cycle. Think of heat as first aid and rehydration as the actual repair, and you will pick the right tool every time.
Permanent Brown Sugar Keepers
Once your sugar is soft again, the goal is to never repeat the rescue. A terracotta brown sugar saver, a small unglazed clay disc you soak in water and tuck into the container, releases moisture slowly and keeps the sugar soft for months. You can make a low-budget version with a damp paper towel or a few marshmallows in the container, though those need swapping out before they mold or dry. The clay disc is the set-and-forget option.
The bigger fix is storage discipline. Move brown sugar out of its clip-top bag and into a genuinely airtight container the day you open it. An airtight seal stops the molasses moisture from escaping in the first place, which is the whole cause of hardening. Glass jars with rubber gaskets and good lock-lid plastic containers both work. Keep it in a cupboard at room temperature, not the fridge, where condensation can cause its own clumping problems.
Can You Substitute or Make Brown Sugar in a Pinch
Sometimes the brick will not soften fast enough and you need to bake now. You can make a quick stand-in by mixing white granulated sugar with molasses, about one tablespoon of molasses per cup of white sugar for light brown and two tablespoons for dark. Stir until the molasses is fully worked through and the sugar looks evenly tan. It behaves almost identically in cookies and quick breads, because you are simply recreating the molasses coating that defines brown sugar.
If you have no molasses, plain white sugar will work in a recipe in a pinch, though you lose the moisture and the caramel notes, so the result bakes a little drier and crisper. That trade-off matters most in chewy recipes that depend on brown sugar for their bend, the kind of texture built into these soft oatmeal cookies. For bakers working in specialty diets, the swap math changes again, since alternative sweeteners do not carry molasses, and the workarounds bakers use are visible across these low-carb keto baking guides and this collection of gluten-free dessert recipes.
One thing worth knowing is that light and dark brown sugar are interchangeable in most recipes, with a small flavor shift. Dark brown sugar has more molasses, so it holds even more moisture and brings a deeper, almost smoky sweetness. If a recipe calls for light brown and all you have is a softened block of dark, use it and expect a slightly moister, more caramel-flavored result. Going the other way, light brown in place of dark gives a milder, slightly less chewy cookie. Neither swap will ruin anything, which is good to remember when the only soft sugar you have is not the type the recipe wanted.
A Few Mistakes to Avoid
Do not soak brown sugar directly in water. Pouring water on it dissolves the surface crystals into syrup and leaves you with a wet, clumpy mess that bakes unevenly. Moisture should arrive slowly through air and steam, never as a direct pour. Do not microwave it dry, which melts and caramelizes the edges instead of softening them. And do not store it in the refrigerator, where temperature swings cause condensation that can both harden and clump it in new ways.
One more mistake is grating or hacking at a hard block to make it usable. People take a knife or a box grater to the brick to get something measurable, and while it technically works, you end up with uneven shards that pack into a measuring cup inconsistently, which throws off the recipe. The grated bits also dry out even faster because you exposed more surface area. It is faster in the moment and worse in the result. Spend the extra time to soften the sugar properly and you get even, accurate sugar that behaves the way the recipe expects.
Finally, do not throw a hard bag away. Brown sugar does not really go bad. The molasses and sugar are shelf stable for a very long time, and a rock-hard block is fully usable the moment you put a little moisture back. The block at the back of your pantry is not waste, it is just waiting for a damp paper towel and a sealed lid. Treat hardening as a moisture problem and you will never lose a bag again. The same instinct that tells you to toss a hard brick is the one to retrain, because in baking, hard brown sugar is one of the easiest problems in the whole kitchen to reverse.
Frequently Asked Questions
What is the fastest way to soften brown sugar?
The microwave is fastest. Place the sugar in a bowl, cover it with a damp paper towel, and heat in 15 to 20 second bursts, breaking up the lump between each one, until it is soft. It softens while warm and can re-harden as it cools, so use it right away. For a hands-off fix instead, seal it with a slice of bread overnight.
Why does my brown sugar keep getting hard?
Brown sugar hardens because the moisture in its molasses coating evaporates, which lets the sugar crystals lock together. This happens when it is exposed to dry air in a loosely closed bag. Storing it in a truly airtight container, ideally with a terracotta sugar saver or a damp item to hold humidity, keeps the moisture in and stops it from clumping.
Can you soften brown sugar overnight without a microwave?
Yes, and it is the gentlest method. Put the hard sugar in an airtight container with a slice of fresh bread, a couple of apple slices, or a folded damp paper towel set on top. Seal it and leave it overnight. The moisture migrates into the sugar and rehydrates the molasses, restoring it soft with no heat and no risk of melting.
Does hardened brown sugar go bad?
No. Hardened brown sugar is not spoiled, just dried out. The sugar and molasses are shelf stable for a very long time, and the block becomes fully usable again the moment you reintroduce moisture with a damp towel, a bread slice, or a short microwave burst. There is no need to throw a hard bag away.