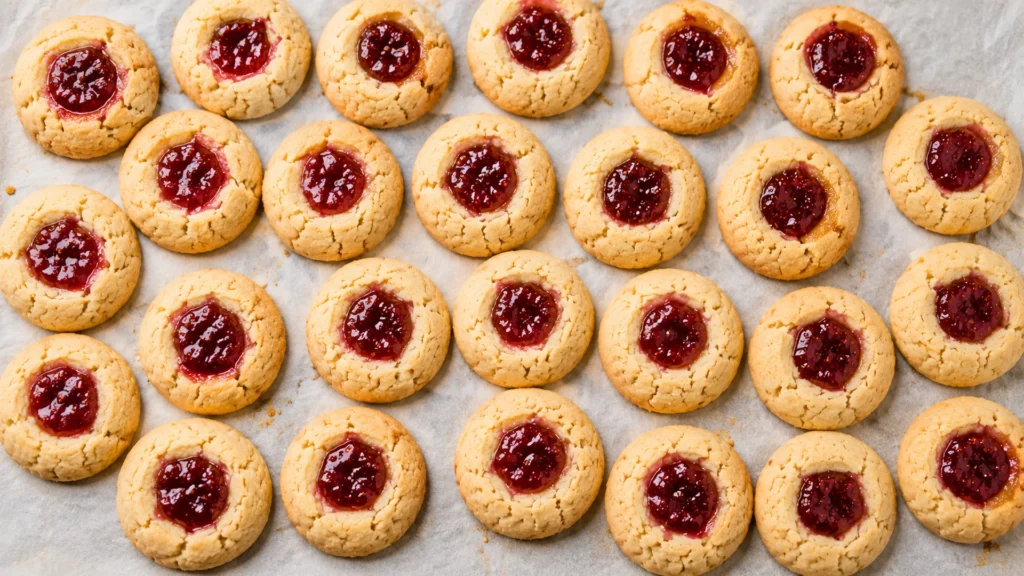
Thumbprint cookies are buttery, shortbread-style cookies with a little well pressed into the center and filled with jam, chocolate, or caramel, and their charm is exactly what makes them tricky: a tender, crumbly dough wants to crack when you press it. Get the dough and technique right and you get a melt-in-the-mouth cookie with a jewel of filling that holds through baking. Get them wrong and you get split sides, cracked wells, jam that bubbles over or sinks, and a dry, sandy bite. This guide covers the whole craft in US units: the dough that bends instead of cracks, how to press a clean well, which jams to use and when to add them, the bake, and the troubleshooting for every failure. By the end you will be able to turn out a tray of clean, filled, buttery thumbprints that look bakery-made.
I bake a lot of these at the bench, especially around the holidays when they are a staple of any cookie box, and the complaints are always the same: my cookies cracked when I pressed them, my jam slid off, my cookies were dry. Each one traces to a specific cause and has a specific fix. Let me start with the dough, because a thumbprint that cracks was usually doomed before it hit the oven.
The Dough: Why It Cracks and How to Stop It
Thumbprint dough is essentially shortbread: high in butter, low in sugar, with no leavening or eggs in the most classic versions, which is what gives the rich, tender, sandy crumb. That same low-moisture, high-fat structure is also why it cracks. There is not much to hold it together when you press a well into it, so the edges split.
The most reliable fix is moisture and a binder. A whole egg or an egg yolk in the dough adds moisture and protein that holds the cookie together and lets it bend under your thumb instead of splitting. Many of the best modern recipes also add a tablespoon or two of cornstarch, which makes the cookie tender and, counterintuitively, less prone to cracking by softening the crumb. A splash of milk or cream can do the same. If your dough feels dry and crumbly when you scoop it, it will crack when you press it, so the dough should hold together easily when squeezed. The other half of the fix is technique, which comes next.
The Ingredient Logic and a Reliable Ratio
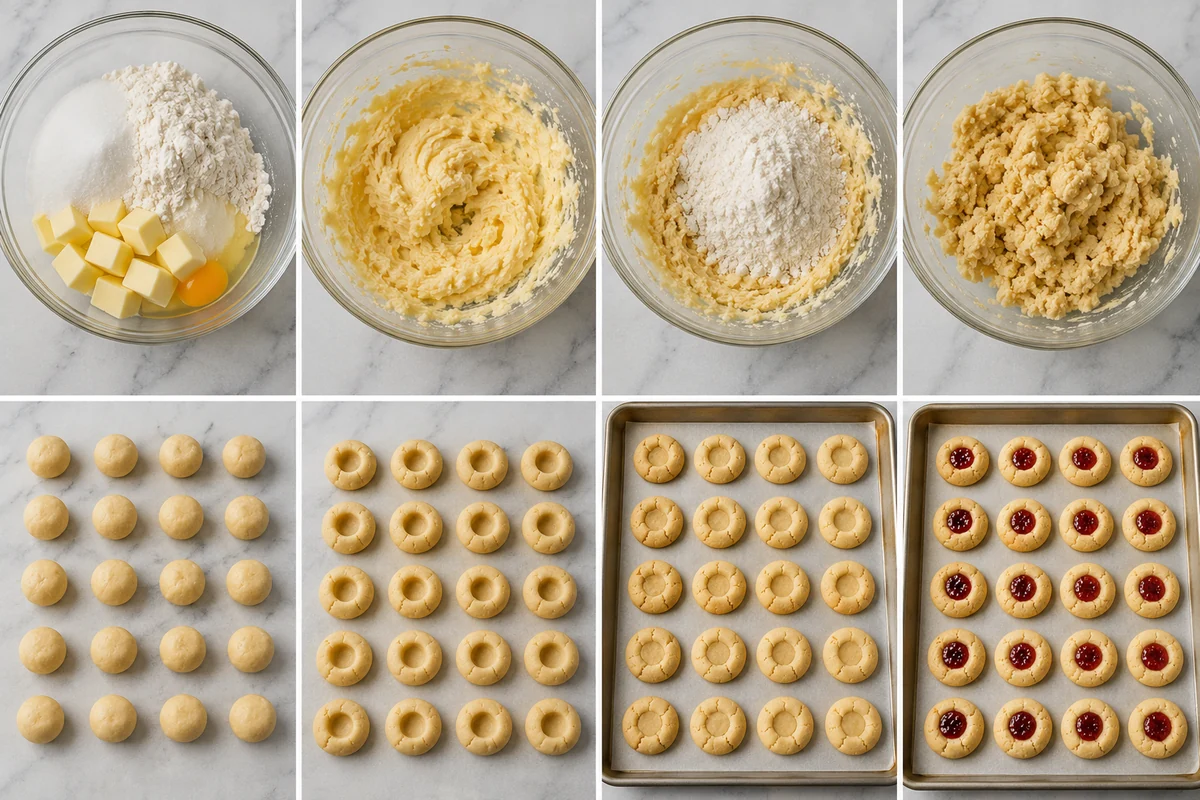
A dependable thumbprint dough runs roughly: 1 cup (227 grams) softened unsalted butter, about 2/3 cup (135 grams) granulated sugar, one large egg yolk, vanilla, 2 and 1/4 cups (281 grams) all-purpose flour, a tablespoon or two of cornstarch, and a good pinch of salt. Notice how much butter there is relative to sugar, which is what gives the rich, tender, shortbread crumb, and notice the egg yolk and cornstarch, the two additions that fight cracking.
Each component pulls its weight. The butter is the flavor and the tenderness, so use a good unsalted one. The sugar stays modest, since this is not a sweet cookie and a leaner sugar load keeps the cookie from spreading and keeps the focus on the buttery base and the jam. The egg yolk adds fat and moisture and binds the dough so it holds together under your thumb, without the egg white that would make the cookie tougher and more cakey. The cornstarch softens the crumb and reduces gluten, which both tenderizes and reduces cracking. The salt is not optional, since a pinch sharpens the sweetness and keeps the buttery cookie from tasting flat. Weigh your flour rather than scooping, because an extra packed quarter cup of flour is the fastest way to turn a tender thumbprint into a dry, sandy one that cracks.
How to Press a Clean Well
The way you press the well decides whether the cookie cracks, and a few small moves prevent almost all splitting. First, roll the dough into smooth, even balls between your palms, since any existing surface crack will widen when you press. Second, press gently and slowly rather than jabbing, using your thumb, the rounded end of a wooden spoon, or a measuring teaspoon to make a clean, round well.
The pro move is to press the wells in two stages. Make a shallow indent before baking, bake the cookies most of the way, then press the wells again gently while the cookies are warm and soft from the oven, which deepens the well cleanly without cracking the now-set edges. If a cookie does crack at the rim as you press, just pinch the split closed with your fingers before baking; the dough is forgiving and will seal. Chilling the dough briefly before pressing also helps, since slightly firm dough holds a cleaner edge than warm, soft dough.
Choosing and Using the Jam
The filling is the personality of a thumbprint, and the choice and handling both matter. Thick, set jams and preserves work far better than thin, runny ones, because a loose jelly will bubble, run over the sides, and slide off. Strawberry, raspberry, apricot, blackberry, fig, and cherry are all classics; raspberry and apricot are especially popular for the color and the tart-sweet balance against the buttery cookie. A thick fruit preserve with visible fruit holds its shape best.
Warm the jam slightly first if it is stiff, microwaving it for a few seconds and stirring until it is just spoonable, which lets it settle into the well evenly without you having to overfill. For a smoother look, push the jam through a fine strainer to remove seeds and chunks. The amount matters: about three-quarters of a teaspoon per cookie is right. Overfill and it bubbles over and sticks the cookies to the pan; underfill and the well looks empty after the jam settles and shrinks in baking. Fill the wells before baking for a jam that sets into the cookie, or, for the brightest color and freshest flavor, bake the cookies with empty wells and add the jam in the last few minutes or just after baking.
| Issue | Cause | Fix |
|---|---|---|
| Cookies crack when pressed | Dry dough, no binder | Add egg yolk and cornstarch, pinch cracks closed |
| Jam runs over | Thin jam, overfilled | Use thick preserves, 3/4 tsp per cookie |
| Well disappears in oven | Shallow well, soft dough | Re-press wells partway through baking |
| Dry, sandy cookie | Too much flour, overbaked | Weigh flour, pull when edges just set |
| Cookies spread flat | Warm dough, soft butter | Chill dough, bake on a cool sheet |
Baking: Temperature and Timing
Bake thumbprint cookies at 350 degrees Fahrenheit for about 14 to 16 minutes, until the edges are lightly golden and set. Because this is a buttery, low-sugar dough, the color change is subtle, so look for set edges and the faintest gold rather than deep browning. A cookie scoop, usually a one-tablespoon size, keeps the cookies uniform so they bake evenly, which matters more here than with most cookies because a tray of mismatched sizes will leave some cookies dry and others underbaked, and the buttery dough offers little browning to warn you.
The dough holds its shape well and does not spread much if it is properly chilled and the butter was not over-softened, so these stay round and thick. If you are pressing the wells in two stages, take the tray out at around the 8 to 10 minute mark, gently deepen each well with the rounded end of a spoon, and return them to finish. Let the baked cookies rest on the sheet for a few minutes to firm up before moving them, since the warm shortbread is fragile and the jam is molten straight out of the oven. The jam stays very hot well after the cookie cools to the touch, so wait before tasting. For decorated holiday trays, a dusting of powdered sugar over the cooled cookies, around the jam, gives a finished look.
Flavor Variations Beyond Plain Jam
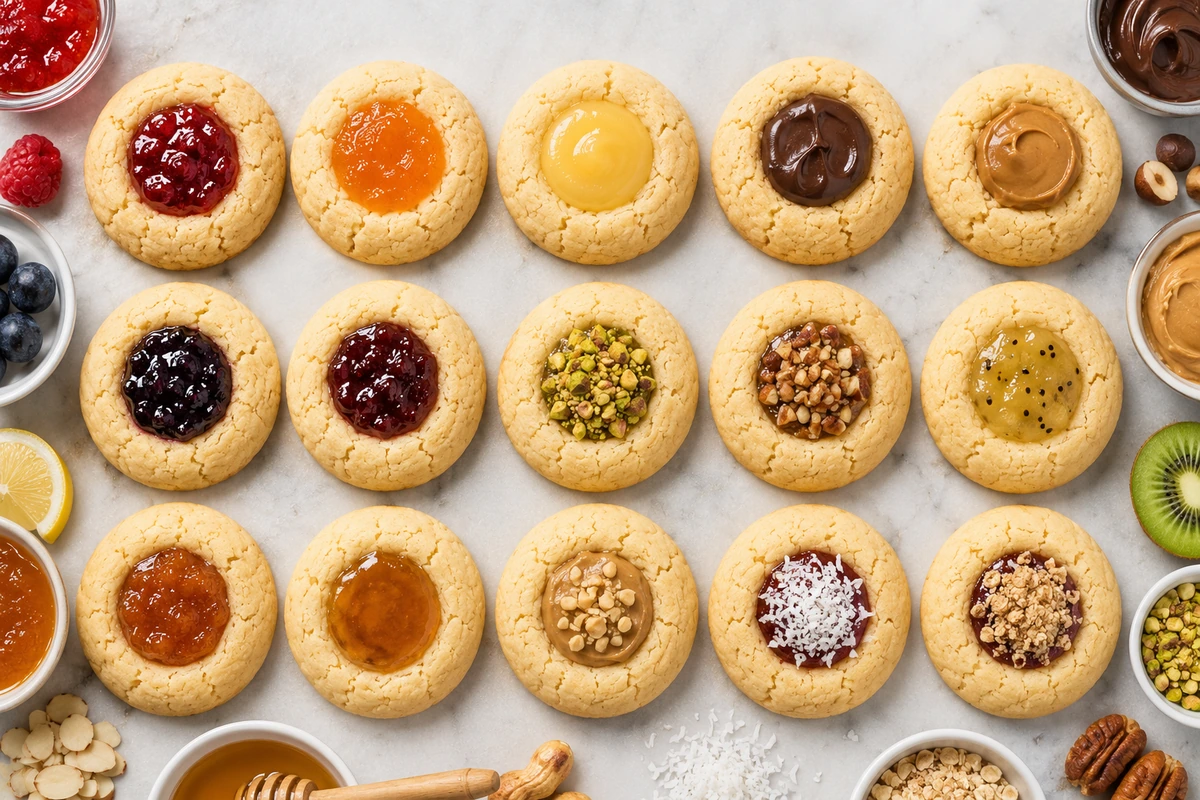
Thumbprints are a template more than a single recipe, and small changes make a whole new cookie. Add a teaspoon of citrus zest, lemon or orange, to the dough to brighten it and pair with a matching jam. Roll the dough balls in finely chopped toasted nuts before pressing the well for a classic thumbprint with a crunchy, pecan or walnut-coated exterior, often paired with apricot or raspberry. A half teaspoon of almond extract in the dough is a natural match for cherry or raspberry filling.
The filling does not have to be jam. Fill the wells with a square of chocolate or a spoon of chocolate ganache for a chocolate thumbprint, with caramel or dulce de leche for a richer cookie, with lemon curd for a tart contrast, or with a dollop of Nutella. For the holidays, raspberry and apricot are the traditional jewel-toned choices that look striking on a cookie box. The buttery, neutral base takes almost any sweet filling, so treat the well as a blank canvas. Browning the butter before creaming adds a nutty depth that is excellent with caramel or chocolate fillings.
If you want to get fancy without much extra work, drizzle the cooled, filled cookies with a thin line of melted white or dark chocolate, which looks polished on a holiday plate and pairs with almost any fruit filling. A pecan-coated apricot thumbprint and a walnut-coated raspberry one are the two classic combinations worth memorizing, since the toasted nut crust adds crunch and a savory edge that balances the sweet jam. For a snow-dusted holiday look, sift powdered sugar over the cooled cookies around the jewel of jam so the well stays glossy and visible. Whichever variation you choose, keep the dough and pressing technique the same; only the coating and filling change.
Storage, Freezing, and Make-Ahead
Thumbprints store and travel well, which is part of why they are a holiday staple. Store cooled cookies in an airtight container at room temperature for up to a week. If you used a soft, fresh-added filling like ganache, keep them a little cooler and eat them sooner. Layer the cookies between parchment so the jam does not stick them together. Avoid refrigerating, which dries out the buttery crumb.
For make-ahead, the dough freezes well. Freeze it as scooped balls, then thaw enough to press the wells, fill, and bake, or freeze the pressed-and-filled cookies and bake from frozen with an extra minute or two. You can also freeze the baked, cooled cookies, ideally before adding a fresh filling, and add the jam after thawing for the cleanest look. Frozen baked thumbprints keep up to three months. This make-ahead flexibility makes them ideal for stocking a holiday cookie box in stages. For more on how shortbread-style doughs behave when chilled and baked, our sugar cookies guide covers the butter-to-flour balance that governs all of these tender doughs, and the make-ahead playbook in our freezing cookie dough guide applies directly here.
Troubleshooting Common Failures
Cookies crack badly when pressed. The dough is too dry or has no binder. Add an egg yolk and a little cornstarch, make sure the dough holds together when squeezed, roll smooth balls, and press slowly. Pinch any cracks closed before baking.
Jam ran all over the pan. The jam was too thin or you overfilled. Use thick preserves, about three-quarters of a teaspoon per well, and do not fill to the brim.
Cookies are dry and sandy. Too much flour or overbaked. Weigh your flour and pull the cookies when the edges are just set and barely gold, not browned.
The well vanished during baking. The indent was too shallow or the dough too soft. Press a deeper well, chill the dough, and re-press the wells partway through baking.
For tested technique on shortbread-style doughs and the role of binders, the kitchens at America’s Test Kitchen have run detailed trials, and the editors at Bon Appetit cover filling choices and pressing technique in depth.
Frequently Asked Questions
Why do my thumbprint cookies crack when I press them?
The dough is too dry or lacks a binder to hold it together. Add an egg yolk and a tablespoon or two of cornstarch, and make sure the dough holds together easily when you squeeze it. Roll smooth, crack-free balls, press slowly rather than jabbing, and pinch any splits closed with your fingers before baking. Re-pressing the wells partway through the bake also helps.
Should I add the jam before or after baking?
Either works. Filling the wells before baking sets the jam into the cookie and is the traditional method. Baking the cookies with empty wells and adding the jam in the last few minutes or just after baking gives a brighter color and fresher flavor. If you fill before baking, use thick preserves so they do not bubble over.
What kind of jam is best for thumbprint cookies?
Thick, set preserves work best, since thin jelly runs and slides off. Strawberry, raspberry, apricot, blackberry, fig, and cherry are all classics, with raspberry and apricot especially popular for color and tart-sweet balance. Warm stiff jam for a few seconds to make it spoonable, and strain out seeds if you want a smoother look.
How much jam goes in each cookie?
About three-quarters of a teaspoon per well is right. Overfilling makes the jam bubble over and stick the cookies to the pan, while underfilling leaves the well looking empty after the jam settles and shrinks during baking. Fill the wells just to the top, not above the rim.
Can I freeze thumbprint cookies?
Yes. Freeze the dough as scooped balls, or freeze pressed-and-filled cookies and bake from frozen with an extra minute or two. You can also freeze the baked, cooled cookies for up to three months, ideally before adding a fresh filling, and add the jam after thawing. This makes them great for prepping a holiday cookie box ahead of time.
Do thumbprint cookies need to be chilled before baking?
A short chill helps. Slightly firm dough holds a cleaner well and spreads less, so the cookies stay round and thick. If your kitchen is warm or the butter was very soft, chill the dough until firm before rolling and pressing. If the dough already feels firm and a ball holds its shape, you can press and bake right away.
Bottom Line
A great thumbprint cookie is a buttery shortbread that bends instead of cracks, holding a clean jewel of filling that does not run. Start with a dough that has enough moisture and a binder, an egg yolk and a little cornstarch, so it holds together when you press it. Roll smooth balls, press the wells slowly, and re-press them partway through baking for a clean, deep cup. Use thick preserves, about three-quarters of a teaspoon per cookie, and decide whether to bake the jam in or add it fresh for brighter color. Pull the cookies when the edges are just set and barely gold so they stay tender, and freeze the dough to bake a holiday tray in stages. Get those right and thumbprints become one of the most reliable, beautiful cookies you can put on a plate.