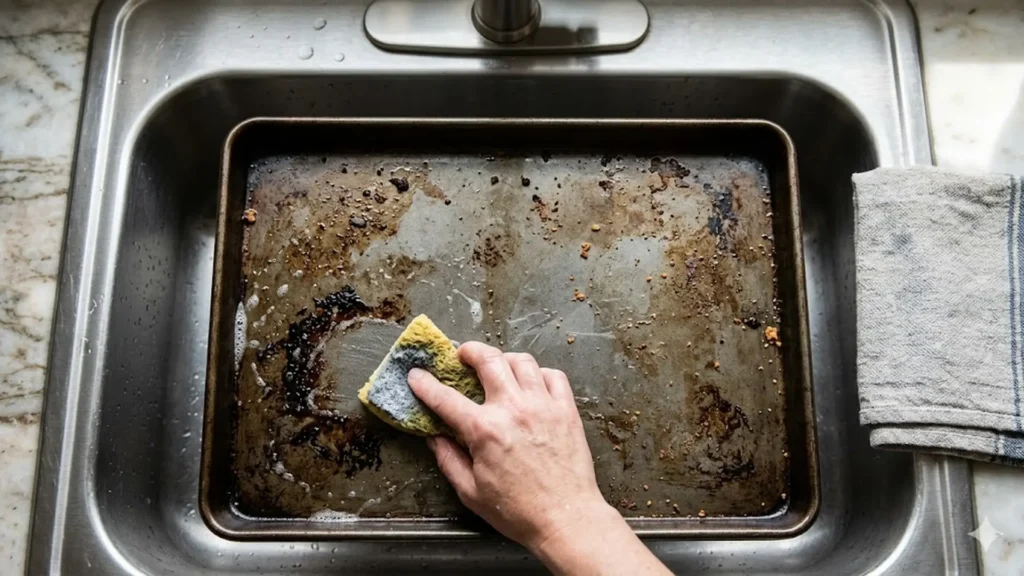
If your cookie sheets have gone from shiny to a streaky brown that no amount of dish soap touches, you are not doing anything wrong. That discoloration is baked-on grease and oil that has polymerized into a tough layer through repeated trips through a hot oven. Regular washing barely makes a dent in it because it is not really dirt anymore; it is a hardened film bonded to the metal. The good news is that the right method lifts it off without much elbow grease, and most of what you need is already in your pantry.
Before you clean a well-used sheet pan, the single most important thing to know is what it is made of. The method that rescues an aluminized steel sheet can ruin a nonstick one. So this guide is organized to keep you safe: we will cover the methods that work, then match each pan material to the methods it can actually handle, then finish with how to keep the buildup from coming back in the first place.
Why Cookie Sheets Discolor and Get Sticky
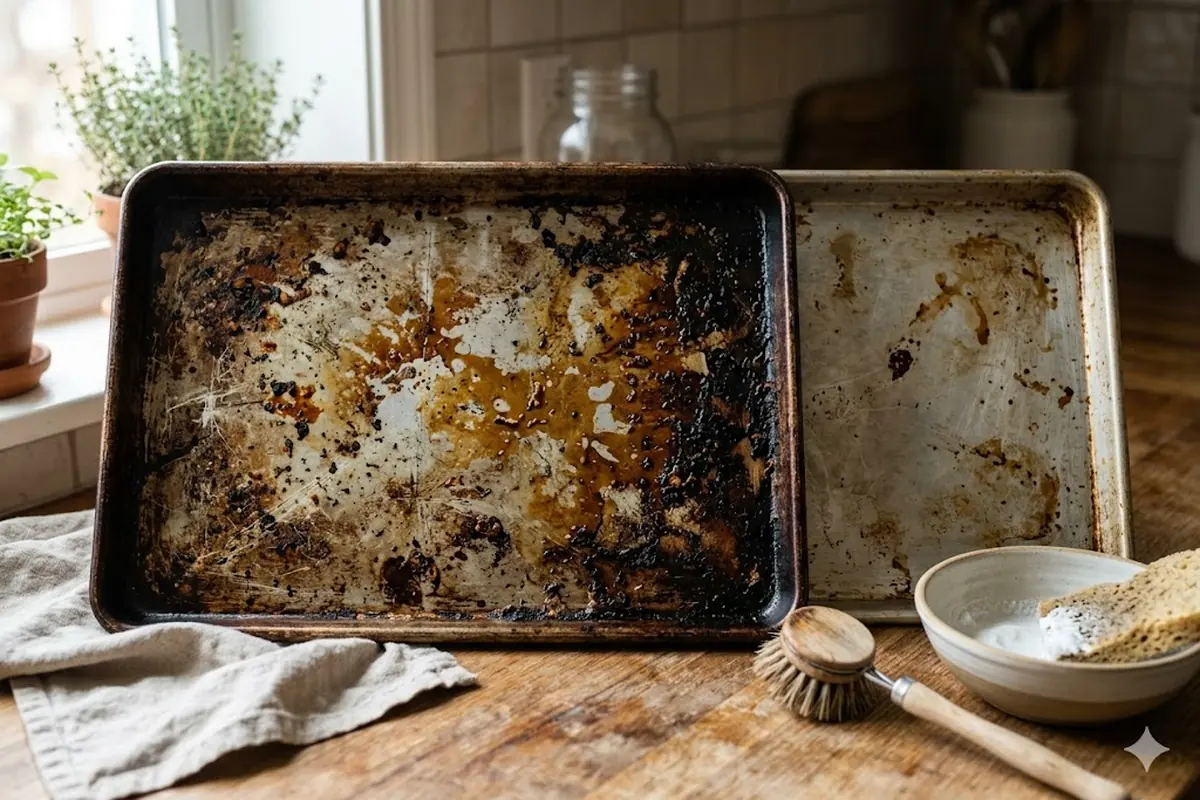
Three things happen to a sheet pan over time. First, oils and fats from whatever you bake spread across the surface and, under high heat, oxidize and polymerize into a varnish-like coating. This is the brown, slightly sticky layer you see. Second, sugars and food residue carbonize into hard black spots, usually where drips landed. Third, with aluminum pans, the metal itself can darken and develop a dull patina from exposure to heat and certain foods.
None of these are harmful, and a discolored pan still bakes fine. But a sticky, uneven surface makes cookies stick and can cause hot spots that brown unevenly, which is one reason your chocolate chip cookies might bake darker on one side. Cleaning the pan back to a smooth surface genuinely helps your baking, not just your kitchen’s appearance.
It helps to understand that this is chemistry, not laziness. When fat is heated repeatedly, its molecules cross-link into a hard, water-resistant film, the same process that seasons a cast-iron skillet. On a cast-iron pan that film is desirable. On a cookie sheet it is just uneven gunk. Because the bond is so strong, soap and water cannot break it, which is why people scrub for ages and get nowhere. The methods below work because they use either a chemical reaction or a mild abrasive to break that bond rather than trying to wash it away. Once you see it as a film to dissolve rather than dirt to wipe, the whole job gets easier and a lot less frustrating.
The Cleaning Methods That Actually Work
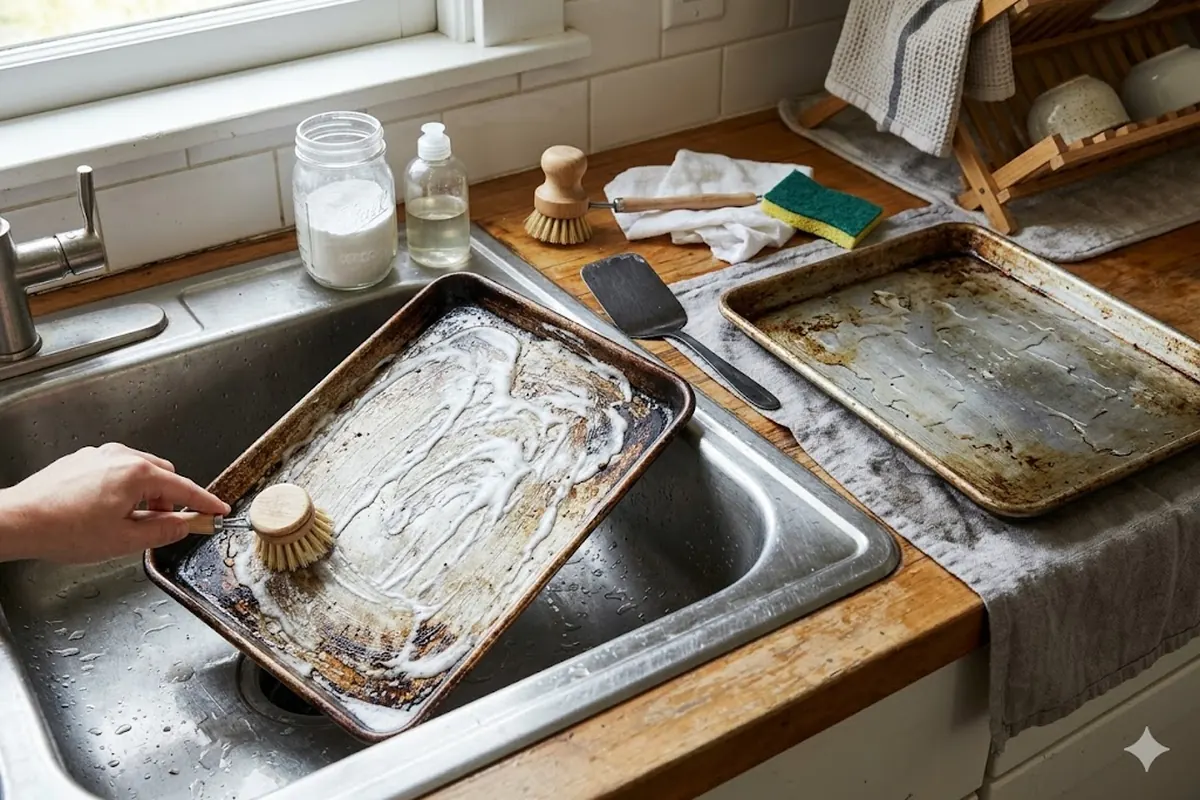
Here are the proven methods, from gentlest to strongest. Start with the mildest one that suits your level of buildup and only escalate if you need to. The reliable cleaning agents here are well documented; baking soda is just sodium bicarbonate, a mild abrasive and base, and it does most of the heavy lifting on every list.
| Method | What you mix | Wait time | Best for |
|---|---|---|---|
| Baking soda + vinegar | Sprinkle soda, pour vinegar to fizz | 30 minutes | Light grease, regular upkeep |
| Baking soda + peroxide | Paste of soda and 3% hydrogen peroxide | 2 to 4 hours | Stubborn burnt-on stains |
| Boiling water + baking soda | Pour boiling water, add soda | 1 hour | Greasy film over the whole pan |
| Cream of tartar boil | Water + cream of tartar, simmer 5 min | While simmering | Discolored aluminum pans |
| Bar Keepers Friend | Damp paste, gentle scrub | A few minutes | Bare stainless and aluminized steel |
Baking soda and vinegar (everyday upkeep)
This is the go-to for normal grease. Sprinkle a generous layer of baking soda across the pan, then pour white vinegar over it so it fizzes. The reaction loosens grease and lifts residue. Let it sit about thirty minutes, then scrub gently with a non-scratch sponge, rinse, and dry. It will not remove years of baked-on varnish in one pass, but for a pan you clean regularly, it keeps things in check.
Baking soda and hydrogen peroxide (stubborn stains)
For real burnt-on buildup, this is the strongest pantry option. Make a paste with baking soda and a little 3 percent hydrogen peroxide, spread it thickly over the stained areas, and let it sit for two to four hours, or overnight for severe cases. The peroxide breaks down the grease while the soda provides scrubbing grit. Wipe it off with a damp sponge and you will see the brown lift away. This method is powerful, which is exactly why it is off-limits for some materials, as the chart below shows.
Boiling water and baking soda (greasy film)
When the whole pan has a thin greasy haze, pour boiling water directly onto it, sprinkle in a few tablespoons of baking soda, and let it work for about an hour. The heat softens the grease and the fizzing action lifts it. Then wipe clean. This is a good first move before you commit to a longer paste soak. If your pan has a raised rim, this method has the advantage of pooling the solution where the grease collects most; flat cookie sheets without a lip are better suited to the paste methods, since liquid just runs off. Match the technique to the shape of the pan as well as its material, and you will waste less effort.
Cream of tartar boil (dull aluminum)
Aluminum pans that have darkened respond well to cream of tartar, which is a mild acid. Sprinkle it over the pan, add water, set it on the stove, and bring it to a boil for about five minutes. It brightens the metal and lifts grease at the same time. Then rinse and dry. Cream of tartar is gentle enough that it is one of the few aggressive-looking treatments aluminum tolerates well.
Bar Keepers Friend (bare metal pans)
For bare stainless or aluminized steel with no coating, a powdered cleanser like Bar Keepers Friend works fast. Make a damp paste, rub it over the surface with a soft cloth or non-scratch pad, let it sit a few minutes, then rinse thoroughly. Never use it on nonstick, and always rinse completely so no residue remains.
The dryer sheet trick (worth a mention)
One method that sounds odd but works for light-to-moderate grease: fill the pan with warm water, drop in a used dryer sheet, and let it soak for an hour or more. The softeners in the sheet help loosen the residue, and a gentle wipe afterward takes off what the soak loosened. It is not as strong as a peroxide paste, but it requires zero scrubbing and uses something you would otherwise throw away. Treat it as a low-effort first attempt before you escalate to a paste.
What to skip, and why
You will see ammonia recommended for the worst aluminized-steel pans, sealed in a bag overnight outdoors. It works, but it is harsh, it stinks, and it is dangerous to mix with other cleaners, so it is best left out of a normal routine. Oven cleaner is another one people reach for; it is extremely caustic and will strip nonstick coatings and etch aluminum, so keep it away from cookie sheets entirely. The pantry methods above handle almost everything a home baker encounters without the hazards. Save the nuclear options for commercial pans you truly cannot rescue any other way.
Match the Method to Your Pan Material
This is the part most cleaning guides bury, and it is the most important. Using the wrong method does not just fail to clean; it can permanently damage the pan. Nonstick coatings scratch and degrade. Bare aluminum pits and corrodes when exposed to ammonia or peroxide. Match before you scrub.
| Pan material | Safe to use | Avoid |
|---|---|---|
| Nonstick | Soak, baking soda paste, nylon scrubber | Peroxide, ammonia, steel wool, harsh acids |
| Bare aluminum | Baking soda, cream of tartar boil | Ammonia, peroxide, long acid soaks (they pit it) |
| Aluminized steel | Almost everything, including a gentle scrub | Prolonged harsh acid soaks |
| Stainless steel | Bar Keepers Friend, baking soda, vinegar | Bleach, very coarse pads |
If you are not sure what your pan is made of, treat it as the most delicate option, which means nonstick rules: soak, use baking soda and a soft scrubber, and skip peroxide, ammonia, and steel wool entirely. You can always escalate later, but you cannot un-scratch a coating.
A quick way to identify your pan: nonstick sheets have a visibly dark, slightly slick coating and usually carry a brand or warning printed on the back. Bare aluminum is silvery, lightweight, and feels slightly soft; you can often scratch it with a fingernail. Aluminized steel is heavier, more rigid, and has a faintly grainy gray surface that resists scratching. Stainless steel is the heaviest and shiniest, with a cold, hard feel. When in doubt, the weight test helps: if the pan feels flimsy it is probably bare aluminum and needs gentle care, while a heavy, stiff pan is likely steel and can take more aggressive cleaning. Knowing which one you own turns this whole process from guesswork into a five-minute job.
What About Nonstick and Coated Sheets?
Nonstick cookie sheets need the gentlest touch on this list. The coating is what keeps your cookies from sticking, and abrasive cleaners or scrubbers wear it away, which ironically makes things stick more over time. For these pans, the safe routine is to soak in warm soapy water, lay a wet paper towel over any stuck-on spots to soften them, then wipe with a soft cloth or nylon scrubber. A mild baking soda paste is fine if you are gentle. Never reach for steel wool, scouring powder, peroxide, or ammonia on nonstick, no matter how stubborn the stain. A little discoloration on a nonstick pan is cosmetic and not worth destroying the coating over.
How to Keep Cookie Sheets Clean Going Forward
The best cleaning is the cleaning you avoid. A few habits keep buildup from ever forming.
- Line your pans. Parchment paper or a silicone baking mat takes the brunt of the grease, so it never touches the metal. This single change prevents most discoloration. Parchment is also why your cookies release cleanly; learn more about parchment paper and keep a roll by the oven.
- Wash while warm, not cold. Grease wipes off far more easily before it cools and hardens. A quick rinse right after the pan is cool enough to handle saves a long soak later.
- Skip the cooking spray. Aerosol sprays leave a sticky residue that bakes into the worst kind of varnish, especially around the edges. Use parchment or a light brush of oil instead.
- Do not stack wet pans. Trapped moisture between stacked pans can cause spotting and, on aluminum, oxidation. Dry them fully before storing.
- Mind your oven temperature. Baking hotter than a recipe calls for accelerates grease polymerization and over-browns the pan. Getting your cookie baking temperature right protects both the cookies and the pan.
Good pan care is part of the same mindset that makes someone better at storage and shelf life generally, like knowing how long homemade cookies last. Small habits compound. The bakers with pristine pans are not scrubbing harder; they are lining their sheets and wiping them down before the grease ever sets.
A Note on Different Bakeware Beyond Cookie Sheets
The same principles carry over to the rest of your kitchen. The other baking surfaces you use, from muffin tins to the basket of an air fryer, build up grease the same way and respond to the same gentle-first approach. If you bake a lot of treats in an air fryer, the residue there is even more prone to sticking because of the constant high-speed hot air, so the same lining and wash-while-warm habits pay off for those air fryer desserts too. And when you finish a batch of cookies and reach for a dessert topping, the saucepan you warm a dessert sauce in cleans up easiest the moment it cools, before the sugar hardens to the bottom. The lesson is universal: heat plus fat plus time equals stuck-on residue, and gentle, prompt cleaning beats aggressive late cleaning every time.
A Realistic Cleaning Routine
You do not need to deep-clean after every batch. Here is the rhythm that keeps pans in good shape without making it a chore. After each use, while the pan is still warm, wipe it down with a soapy cloth and rinse; this removes fresh grease before it can set. Once a month, or whenever you notice a sticky feel returning, do a baking soda and vinegar treatment to stay ahead of buildup. And once or twice a year, when a pan has earned it, commit to an overnight peroxide paste to bring it back toward new. Spacing the effort this way means you almost never face a truly baked-on disaster, because you never let one develop. The pans that look terrible are the ones that only get attention once a year; the ones that stay nice get a quick wipe every time.
Keep in mind that some staining is permanent and that is fine. After enough use, even a well-cared-for aluminum pan takes on a warm bronze tone that will not fully scrub out. That patina does not affect performance in any way that matters for cookies. Chase smoothness and a non-sticky surface, not a mirror finish. A pan that releases cleanly and bakes evenly is doing its job, regardless of color.
FAQ
How do I get baked-on grease off a cookie sheet?
Make a paste of baking soda and a little hydrogen peroxide, spread it over the greasy areas, and let it sit two to four hours or overnight. The peroxide breaks down the polymerized grease and the baking soda provides gentle scrubbing grit. Wipe clean and rinse. For nonstick pans, skip the peroxide and use a baking soda paste with a soft scrubber instead.
Can I use vinegar to clean cookie sheets?
Yes. Sprinkle baking soda over the pan, pour white vinegar on top to create a fizzing reaction, wait about thirty minutes, then scrub and rinse. It works well for routine grease. Avoid long vinegar soaks on bare aluminum, since prolonged acid contact can dull and pit the metal.
How do I clean cookie sheets without scratching them?
Use non-abrasive tools: a nylon scrubber, soft cloth, or non-scratch sponge, paired with a baking soda paste rather than scouring powder. Soaking first does most of the work so you do not have to scrub hard. This is essential for nonstick pans, where any rough scrubber damages the coating.
Should I throw away a discolored cookie sheet?
No. Discoloration is cosmetic and a darkened pan still bakes fine, though darker pans run a little hotter and can over-brown the bottoms. Replace a pan only if the coating is flaking on a nonstick sheet, or if it is warped badly enough to rock in the oven. Plain brown staining is not a reason to toss it.