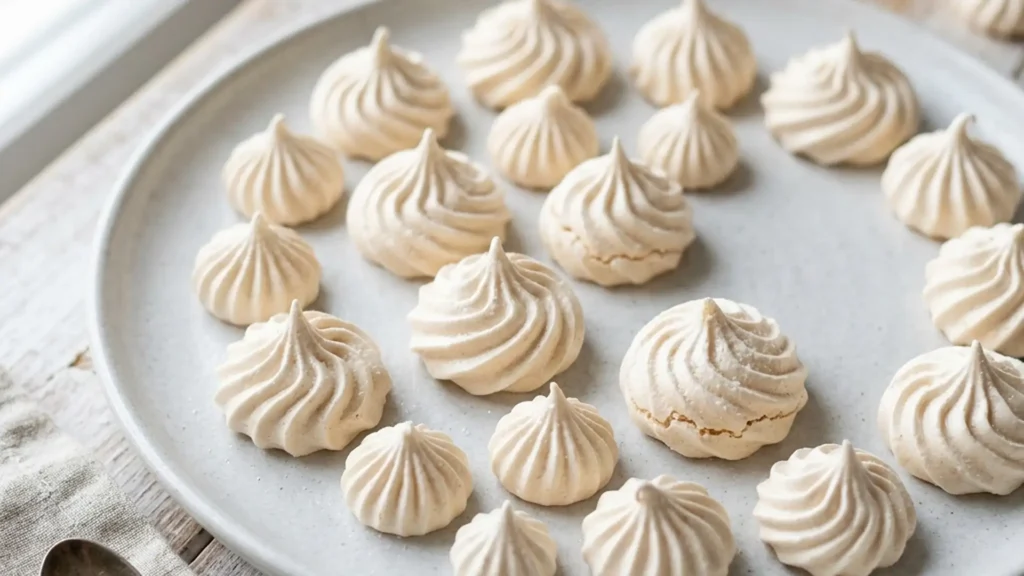
Meringue cookies are nothing but egg whites and sugar whipped into a stable foam and dried slow in a low oven, yet they fail for predictable, fixable reasons: weeping beads of syrup, a chewy center, cracks, or a sticky surface an hour after they cool. Almost every one of those problems traces back to two things the popular recipes gloss over, the sugar-to-egg-white ratio and which meringue method you used. Get those two right and these go from finicky to foolproof.
Here is the short version. Meringue cookies are made by whipping egg whites with about twice their weight in sugar until stiff and glossy, then baking low and slow at 200 to 225F for roughly 1 to 2 hours to dry them out without browning. Use room-temperature whites, a spotlessly grease-free bowl, an acid like cream of tartar for stability, and never bake them on a humid day. That is the whole recipe in three sentences.
The Sugar-to-Egg-White Ratio Nobody Tells You
This is the rule that makes meringue make sense. Sugar is not just for sweetness in a meringue; it is the structural stabilizer that lets the foam hold its shape and dry into a crisp shell. The reliable ratio is roughly 2 parts sugar to 1 part egg white by weight, which works out to about 50 grams of sugar per large egg white. Four large whites weigh around 120 to 140 grams, so you want about 240 to 280 grams, which is close to the 1 cup most recipes call for.
Why does this matter? Too little sugar and the foam is unstable, weeps, and collapses. Too much and the meringue turns grainy and sticky and never fully crisps. Once you know the ratio, you can scale up or down with confidence instead of guessing. If you only remember one number from this page, remember 2 to 1 by weight. America’s Test Kitchen has tested meringue stability extensively and confirms that sugar quantity and how slowly you add it are the biggest levers on whether the foam holds (see their meringue work at America’s Test Kitchen).
French vs Swiss Meringue: Pick the Right One
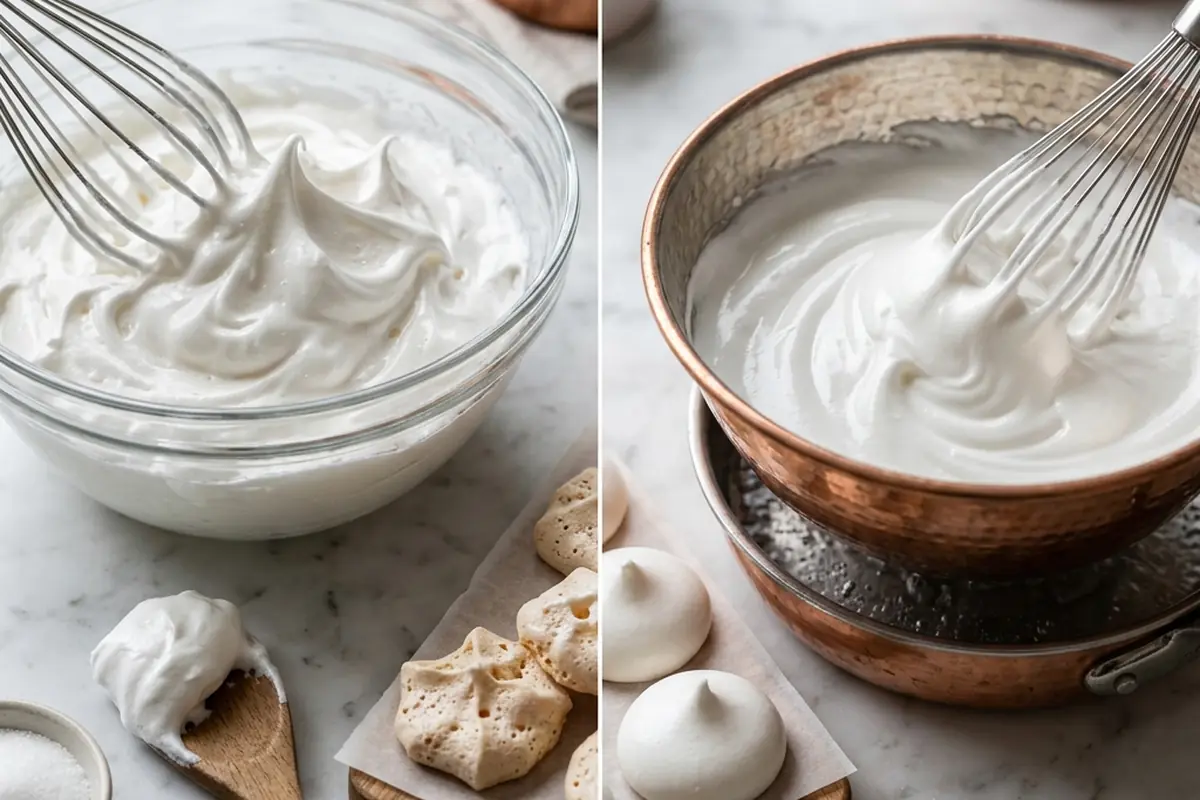
Here is the choice that separates a sometimes-works recipe from a reliable one, and almost no home recipe explains it. There are two methods worth knowing for cookies.
French meringue is the standard: you whip raw egg whites and slowly rain in granulated sugar until stiff and glossy. It is the easiest and the one most recipes use. Its weakness is that the sugar can fail to fully dissolve, which is the leading cause of weeping, those little syrup beads on the surface.
Swiss meringue is the more stable choice. You warm the egg whites and sugar together over a pot of simmering water, whisking, until the sugar fully dissolves and the mixture reaches about 160F, then whip it to stiff peaks off the heat. Because the sugar is completely dissolved, Swiss meringue almost never weeps, holds its shape beautifully when piped, and is more forgiving in mild humidity. Swiss meringue suits crisp, glossy, picture-perfect cookies, and French works when you are in a hurry and the weather is dry.
How to Whip Meringue That Holds
Start with a clean, dry, grease-free bowl. Any fat, a smear of yolk, a greasy spatula, or even a plastic bowl that holds oils will keep the whites from foaming. Metal or glass bowls are best for that reason. Bring the whites to room temperature, which lets them whip to greater volume.
Beat the whites on medium until foamy, add 1/2 teaspoon cream of tartar (an acid that stabilizes the foam), then raise the speed and start adding the sugar very slowly, about a tablespoon at a time. Rushing the sugar is the second most common cause of weeping and graininess. Keep whipping until the meringue is stiff, glossy, and holds a peak that does not fold over, usually 8 to 12 minutes. Rub a little between your fingers; if it feels gritty, the sugar has not dissolved, so keep going.
Why the Foam Holds: A Little Science
Understanding what is actually happening makes every troubleshooting step obvious. Egg whites are mostly water and protein. When you whip them, you unfold those proteins and trap air in a network of tiny bubbles, and the proteins link up around the air to form a foam. Sugar then dissolves into the water phase and thickens it, which slows the bubbles from collapsing and gives the foam its glossy, stable structure. The acid from cream of tartar helps the proteins bond at the right strength, not too weak and not so tight that the foam turns dry and grainy.
That is why fat is the enemy: fat molecules wedge between the proteins and stop them from forming a stable network, so even a trace of yolk or grease keeps the whites from whipping. It is also why you add sugar gradually; dumping it in all at once weighs down the foam before the proteins have set their structure, and the meringue deflates. And it is why low, slow baking matters; you are evaporating the water out of that foam without cooking the proteins so hard that they brown or crack. Every rule on this page comes back to protecting that fragile protein-and-air structure.
Separating Eggs and Pasteurization
Clean separation is half the battle. Separate eggs while they are cold, since cold yolks are firmer and less likely to break, then let the whites come to room temperature before whipping. Crack each egg over a small bowl and add the white to your mixing bowl only after you confirm there is no yolk, so one broken yolk does not ruin the whole batch. A single drop of yolk has enough fat to keep the whites from reaching stiff peaks.
Because traditional French meringue cookies bake at such a low temperature, some people worry about raw egg safety. If that concerns you or you are serving someone vulnerable, use Swiss meringue, which heats the whites and sugar to about 160F over a water bath and effectively pasteurizes them. You can also buy pasteurized egg whites in a carton, though they sometimes take longer to whip to stiff peaks. Either route gives you peace of mind without changing the cookie.
Piping and Baking
Transfer the meringue to a piping bag fitted with a star tip and pipe small swirls onto parchment-lined sheets, spacing them an inch apart since they barely spread. A plain round tip gives smooth kisses; a star tip gives ridged rosettes. Bake at 200 to 225F for 1 to 2 hours depending on size. The goal is to dry them out, not bake them, so they should stay white. If they brown, your oven runs hot, so drop the temperature.
The step that makes or breaks the texture comes after baking: turn off the oven and leave the meringues inside with the door closed for at least another hour, ideally until the oven is fully cool. This slow, gentle finish dries the centers completely and prevents the cracking that comes from a sudden temperature change. Pulling them straight out into a cool kitchen is how you get chewy middles and cracked shells.
The Humidity Rule That Saves Batches
Meringue cookies are basically dried sugar, and sugar pulls moisture from the air. On a humid or rainy day, even perfectly baked meringues will turn sticky and soft within an hour of cooling, no matter what you do. The fix is simple: do not make meringue cookies when the humidity is high. Check the weather before planning a batch, and on a damp day bake something else.
If you must bake on a borderline day, store the cooled cookies immediately in an airtight container with a few packets of silica gel or a small open cup of dry rice to absorb moisture. This genuinely extends their crisp life. Bon Appetit has a good explainer on how humidity and temperature affect sugar-based baking that is worth a read if you bake in a damp climate (Bon Appetit).
Troubleshooting Meringue Cookies
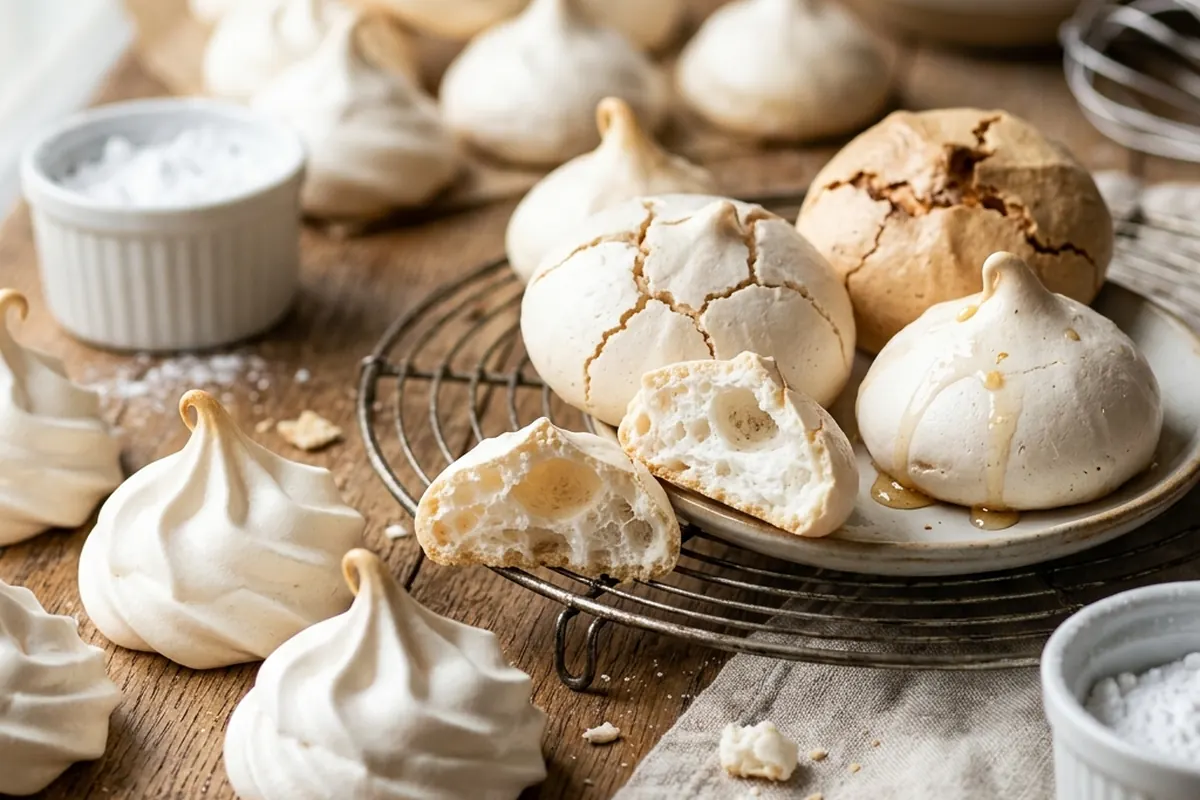
When meringues misbehave, read the symptom and the cause is usually clear.
Weeping (syrup beads on the surface). Undissolved sugar or too few minutes of whipping. Add sugar more slowly next time, whip longer, or switch to Swiss meringue where the sugar fully dissolves over heat.
Chewy or sticky centers. Underbaked, or humidity got to them. Bake longer at a low temperature and always cool them inside the turned-off oven. If the room is humid, that is your culprit.
Cracked shells. The oven was too hot or you cooled them too fast. Lower the temperature so they dry rather than bake, and let them cool gradually in the oven.
Browning instead of staying white. Oven too hot. An oven thermometer settles it; many home ovens run 25F off. Drop to 200F.
Foam never reached stiff peaks. Grease in the bowl or a speck of yolk in the whites. Start over with a spotless metal or glass bowl and carefully separated whites.
A Vegan Meringue With Aquafaba
You can make meringue cookies without any eggs, and most recipes never mention it. Aquafaba, the liquid from a can of chickpeas, whips up into a foam that behaves remarkably like egg whites because it contains similar proteins and starches. Use about 3 tablespoons of aquafaba in place of each egg white, add cream of tartar for stability, and whip it longer than you would whites, since it takes more time to reach stiff peaks.
Then add sugar slowly using the same 2-to-1 logic by weight, pipe, and bake low and slow exactly as you would the egg version. The texture is genuinely close, crisp outside and light within, and it is a lifesaver for anyone avoiding eggs. The aquafaba versions can be slightly more delicate, so handle them gently once baked.
Flavor Variations and Serving
Meringue takes flavor and color easily because the base is so neutral. Beat in 1/2 teaspoon of almond, peppermint, or lemon extract at the end instead of or alongside vanilla. For natural color and a fruity tang, fold in a spoonful of freeze-dried fruit powder, which adds flavor without the moisture that fresh fruit would introduce and ruin the foam. A swipe of gel food coloring inside the piping bag gives striped swirls.
For an easy upgrade, dip the bottoms of cooled meringues in melted chocolate and let them set, or drizzle chocolate over the tops and scatter chopped nuts or sprinkles. Crushed meringues are also gorgeous over whipped cream and berries for a quick Eton mess. If you want a heartier cookie to round out a tray alongside these light ones, these peanut butter chocolate bars make a good chewy counterpoint, and the chewy spiced bite of these peanut butter snickerdoodles balances a plate of these airy ones nicely.
Sizes, Shapes, and Bake Times
Size changes the bake time, and that trips people up. Small kisses about an inch wide dry out in around an hour at 200F, while larger swirls two inches across can need 1.5 to 2 hours, plus the cool-down in the oven. If you pipe a mix of sizes on one sheet, the small ones finish first, so either keep each sheet to one size or pull the small ones early and return the big ones. The cookie is done when it lifts cleanly off the parchment and the bottom is dry and firm, not tacky.
Beyond simple kisses and rosettes, the same meringue pipes into other shapes. Pipe long thin fingers for slim dipping sticks, flat spiral discs to layer into a pavlova-style dessert, or little nests with a well in the center to fill with lemon curd or whipped cream after baking. A French star tip gives the most defined ridges, which both look good and create more surface area that crisps nicely. For kids, pipe simple round blobs and let them choose the colors; the technique is forgiving once your foam is stable.
Storage and Make-Ahead
In dry conditions, meringue cookies keep up to 2 weeks in an airtight container at room temperature, which is far longer than most cookies because they contain almost no moisture to go stale. The enemy is humidity, not time. Add a few packets of silica gel or a small cup of dry rice to the container to keep them crisp.
If they soften, you can often revive them by drying them again in a 225F oven for 10 to 20 minutes, then cooling them in the turned-off oven. Do not refrigerate meringues; the fridge is humid and will turn them sticky fast. For make-ahead, bake them a day or two before an event and store them airtight, but on a rainy week, bake the day of. If you are also baking a brown-sugar dough that has hardened in the pantry, the quick fixes in the guide on how to soften brown sugar will help there too.
Frequently Asked Questions
Why are my meringue cookies weeping?
Weeping, those syrup beads on the surface, comes from undissolved sugar. Add the sugar more slowly while whipping, whip until no grittiness remains when you rub a bit between your fingers, or switch to Swiss meringue where the sugar dissolves fully over gentle heat before whipping.
Why are my meringues chewy instead of crisp?
They are underbaked or they absorbed moisture from a humid kitchen. Bake longer at a low temperature, always cool them inside the turned-off oven to dry the centers, and avoid making them on damp or rainy days.
Do I need cream of tartar?
It is not strictly required, but it stabilizes the egg-white foam and helps it hold its shape. If you do not have it, substitute an equal amount of lemon juice or white vinegar, which provide the same stabilizing acid.
What temperature should I bake meringue cookies at?
Low, between 200 and 225F. You are drying them out, not baking them, so they should stay white. If they brown, your oven runs hot and you should lower the temperature, ideally checking with an oven thermometer.
Can I make meringue cookies without eggs?
Yes. Use aquafaba, the liquid from canned chickpeas, about 3 tablespoons per egg white. Whip it with cream of tartar until stiff, add sugar slowly, then pipe and bake low and slow just like the egg version. The result is crisp and light.
How long do meringue cookies last?
Up to 2 weeks airtight at room temperature in dry conditions, since they contain little moisture. Keep them away from humidity, add silica gel or dry rice to the container, and never refrigerate them or they will turn sticky.
Bottom Line
Meringue cookies stop being temperamental the moment you treat them as chemistry rather than luck. Hold the sugar at roughly twice the weight of the whites, choose Swiss meringue when you want bulletproof results or French when the day is dry, whip in a grease-free bowl, dry them low and cool them slowly in the oven, and refuse to bake them when it is humid. Follow those rules and you get crisp, glossy, melt-in-your-mouth cookies every single time, eggs or no eggs.