These delectable cookie cups are an absolute must-try for anyone who loves a good homemade treat. The combination of nutty brown butter and sweet dulce de leche creates an unforgettable flavor profile that will have everyone asking for more. This recipe for brown butter dulce de leche cookie cups is designed to be approachable yet impressive, making it ideal for both seasoned bakers and ambitious beginners. I’ve found that mastering the brown butter technique is key to elevating these cookie cups from good to extraordinary. The depth of flavor it adds is truly unparalleled, transforming simple ingredients into something truly special.
Key takeaways
- Browning butter is essential for nutty depth of flavor.
- Using both all-purpose and bread flour creates a desirable chewy texture.
- Room temperature eggs ensure proper dough emulsification and texture.
- Proper chilling of dough and careful baking are key to preventing spread and dryness.
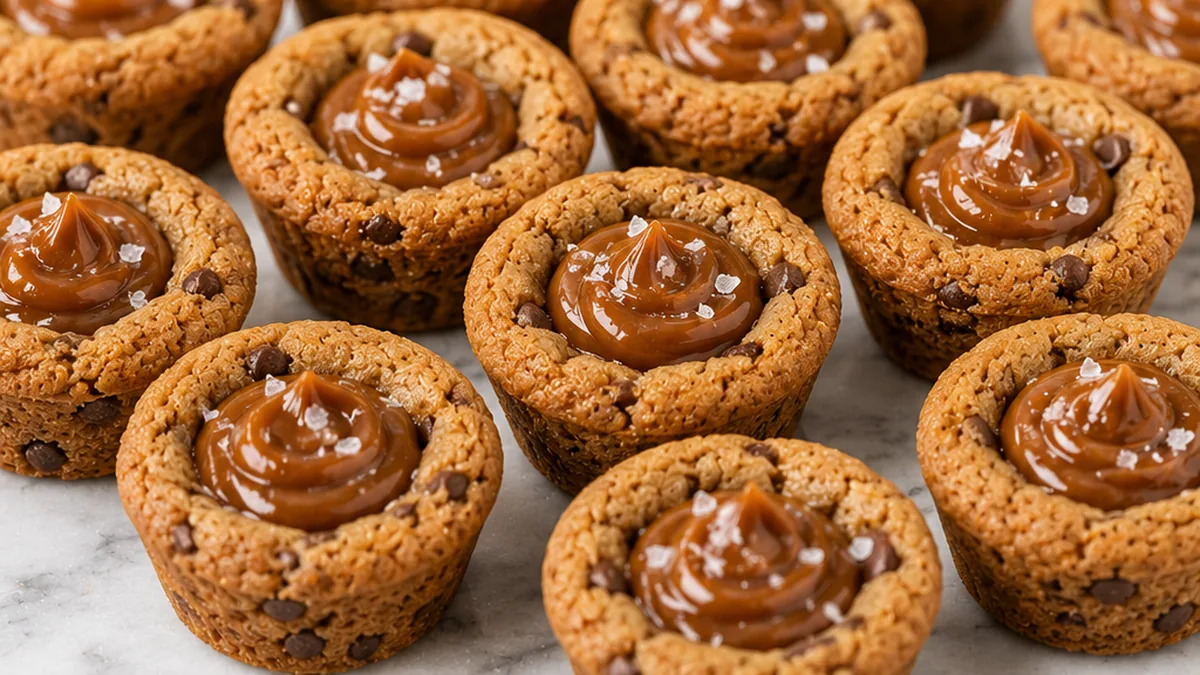
Irresistible Brown Butter Dulce de Leche Cookie Cups!
Ingredients
Method
- Preheat the oven to 350°F. Spray two 24 mini-muffin tins with nonstick cooking spray.
- In a medium bowl, combine the flours, baking powder, baking soda, and salt. Set aside.
- In a stainless steel sauté pan set over medium heat, melt the butter. Swirling the pan occasionally, continue to cook the butter. It should become foamy with audible cracking and popping noises. Once the crackling stops, continue to swirl the pan until the butter develops a nutty aroma and brown bits start to form at the bottom. Once the bits are amber in color, about 2 to 3 minutes after the popping stops, remove from heat and pour into a mixing bowl, scraping in all the browned bits.
- While the butter is still hot, stir in the granulated sugar and brown sugar. Let cool to just warm before adding in the vanilla, eggs, and yolk, one at a time, stirring well with a rubber spatula after each addition. Add the dry ingredients and mix until just combined.
- Press a 1-tablespoon sized ball of dough into each mini muffin cavity. Bake for 12 to 15 minutes, or until edges are lightly golden brown and the center is set. Remove from oven and, using the round end of a wooden spoon or whisk, make 1-inch wide indentations into the center of each cookie.
- While cookies are still warm, fill each cookie’s center with dulce de leche using a spoon or piping bag. Sprinkle with sea salt. Let cool completely before serving.
Notes
– Ensure your eggs are at room temperature to prevent the mixture from seizing when added to the warm butter-sugar mix. This creates a smoother batter.
– For a perfect indentation, press gently but firmly with the back of a round spoon or whisk while the cookies are still hot from the oven. If they cool too much, they might crack.
– Store leftover cookie cups in an airtight container at room temperature for up to 3 days, or freeze for up to 1 month. Thaw at room temperature before serving. Nutrition information is an estimate, calculated automatically. Values vary with brands, substitutions and portion sizes.
The Magic of Brown Butter and the Perfect Cookie Cup Base
The secret to these irresistible cookie cups lies in two key techniques: browning the butter and achieving the ideal cookie dough texture. Browning butter, also known as beurre noisette, is a crucial step that transforms ordinary butter into a nutty, deeply flavorful ingredient. As butter heats, its milk solids toast, imparting a complex aroma and taste that elevates the cookies beyond a simple sweet treat. It’s essential to brown the butter gently over medium-low heat, swirling the pan frequently, until it turns a rich amber color and smells fragrant. Be careful not to burn it, as this will result in a bitter flavor.
The combination of all-purpose and bread flour is also deliberate. All-purpose flour provides a balanced structure, while bread flour, with its higher protein content, contributes to a chewier texture and better structure, which is vital for cookie cups that need to hold their shape and contain a filling. The ratio of granulated to dark brown sugar is equally important. Granulated sugar contributes to crispness, while the high molasses content in dark brown sugar adds moisture, chewiness, and a deeper caramel flavor, complementing the brown butter beautifully. Ensuring your eggs and egg yolk are at room temperature is critical for proper emulsification. Cold eggs can cause the butter and sugar mixture to seize, leading to a greasy dough and potentially tough cookies. Room temperature eggs blend seamlessly, creating a smooth, cohesive dough that bakes evenly.
- Problem: Cookies are too flat and spread too much.
Fix: Ensure your butter was properly chilled after browning and before creaming with sugars. Also, chilling the dough for at least 30 minutes before baking helps prevent excessive spreading. - Problem: Cookie cups are dry or crumbly.
Fix: This often indicates overbaking or insufficient moisture. Reduce baking time slightly and ensure you’re using packed brown sugar. Over-mixing the flour can also develop gluten too much, leading to dryness; mix just until combined. - Problem: Cookie cups lack flavor or taste bland.
Fix: Double-check that your butter was adequately browned to a rich amber color and smelled nutty. Also, ensure you used good quality vanilla extract and didn’t skimp on the salt, which enhances all other flavors. - Problem: Cookie cups are difficult to remove from the muffin tin.
Fix: Generously grease and flour your muffin tin, or use baking spray with flour. Allowing the cookie cups to cool in the tin for about 5-10 minutes before attempting to remove them will help them set and release more easily.
- Flour: You can substitute all the all-purpose and bread flour with 3 cups (382 grams) of a good quality all-purpose flour. The texture will be slightly less chewy and structured, but still delicious.
- Brown Sugar: If you don’t have dark brown sugar, you can use light brown sugar, though the cookies will be slightly less moist and have a milder caramel flavor. Alternatively, mix 1 cup (200 grams) granulated sugar with 1/4 cup (85 grams) molasses for a similar effect.
- Butter: While brown butter is key for flavor, in a pinch, you can use regular unsalted butter (melted and slightly cooled). The flavor profile will be less complex, but the texture should remain similar.
- Vanilla Extract: You can substitute vanilla extract with 1 teaspoon of almond extract or a combination of 1/2 teaspoon of maple extract and 1/2 teaspoon of rum extract for a different flavor dimension.
Pro tips
- Don’t rush the browning of the butter; it’s what gives these cookie cups their signature nutty flavor. Wait for those amber bits at the bottom.
- Ensure your eggs are at room temperature to prevent the mixture from seizing when added to the warm butter-sugar mix. This creates a smoother batter.
- For a perfect indentation, press gently but firmly with the back of a round spoon or whisk while the cookies are still hot from the oven. If they cool too much, they might crack.
- Store leftover cookie cups in an airtight container at room temperature for up to 3 days, or freeze for up to 1 month. Thaw at room temperature before serving.
These brown butter dulce de leche cookie cups are more than just a dessert; they’re a delightful experience. Try making them for your next gathering or simply to treat yourself. Enjoy every single bite!
Try this next: Bakery Style Chocolate Chip Cookies
More from Sugar & Cut-Out Cookies →