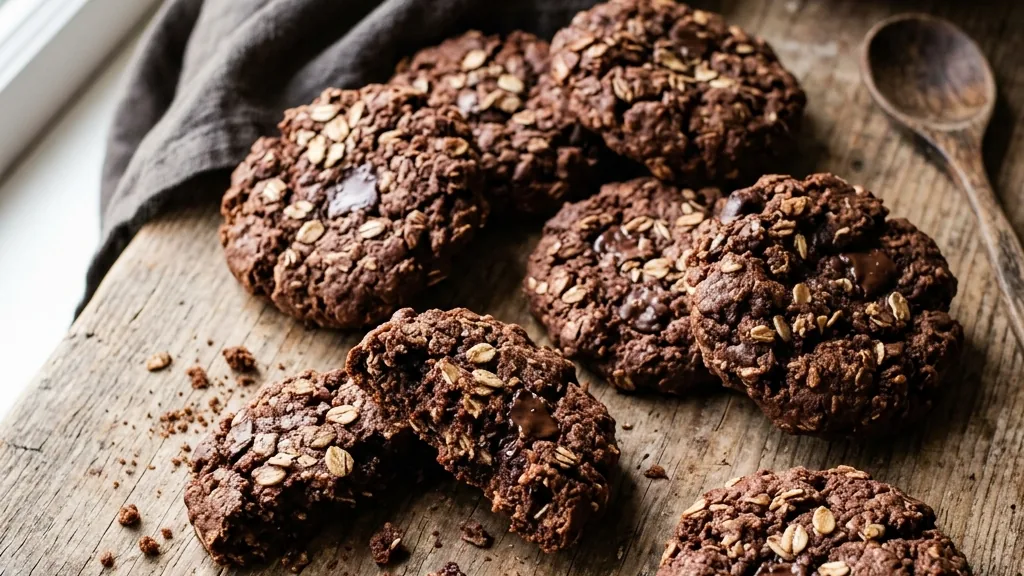
Oats cocoa cookies are the chewy, chocolatey treat that turns a few pantry staples into something everyone reaches for. Built on oats and cocoa powder, they come in two classic forms: the famous stovetop no-bake version that sets in half an hour without an oven, and a baked version with a soft, chewy crumb. This guide gives you both recipes, explains the one timing step that makes or breaks the no-bake batch, and shows you how to get the texture you want every time.
Whether you want a quick fix on a hot day when the oven stays off, or a warm batch fresh from the oven, the oats-and-cocoa combination delivers rich chocolate flavor with a satisfying, hearty bite.
No-Bake Oats Cocoa Cookies
The no-bake version is a nostalgic favorite for good reason: it is fast, needs no oven, and turns out fudgy and chewy. The whole thing comes together on the stovetop in minutes.
Ingredients
- 2 cups granulated sugar
- 1/2 cup (1 stick) butter
- 1/2 cup milk
- 1/4 cup unsweetened cocoa powder
- 1/2 cup peanut butter
- 1 teaspoon vanilla extract
- 3 cups quick oats
- A pinch of salt
Method
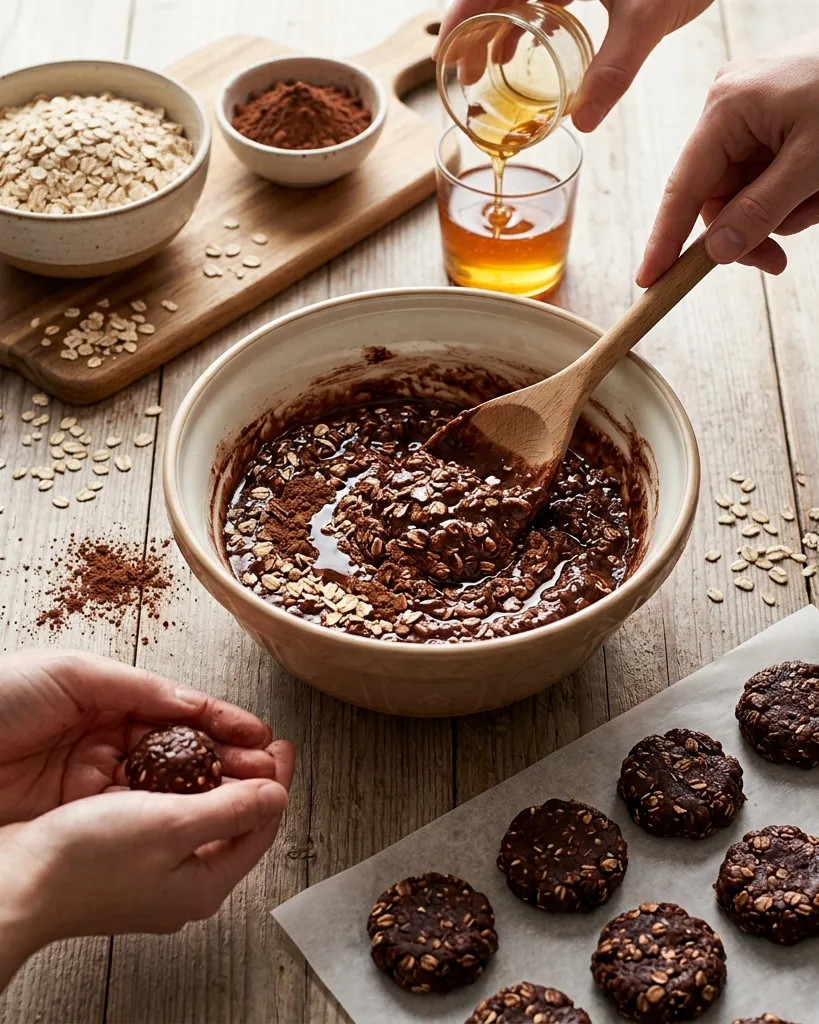
- Combine the base: In a saucepan, stir together the sugar, butter, milk, and cocoa powder over medium heat until the butter melts.
- Boil precisely: Bring the mixture to a full rolling boil and let it boil for 1 to 2 minutes, reaching about 225 F. This step is critical, so watch the clock.
- Add the rest: Remove from heat and stir in the peanut butter and vanilla until smooth, then mix in the oats and salt until evenly coated.
- Drop and set: Spoon mounds onto parchment paper and let them set for 20 to 30 minutes at room temperature, or speed it up in the fridge.
Why the Boil Time Is Everything
If there is one secret to perfect no-bake cookies, it is the boil. The 1-to-2-minute rolling boil concentrates the sugar syrup just enough so the cookies set firm but stay chewy once cooled. Get it wrong and the texture suffers in predictable ways. Boil too long, and the cookies turn out dry and crumbly. Boil too short, and they stay gooey and never fully set. Use a timer the moment the mixture reaches a true rolling boil, not just a simmer, and pull it at the one-to-two-minute mark. A candy thermometer reading around 225 F takes the guesswork out entirely.
Baked Oats Cocoa Cookies
If you prefer a traditional baked cookie, the same oats-and-cocoa flavor works beautifully in the oven. These come out soft and chewy with a deeper, toasted chocolate note.
Ingredients
- 1 cup butter, softened
- 1 cup brown sugar and 1/2 cup white sugar
- 2 large eggs and 1 teaspoon vanilla
- 1 and 1/2 cups all-purpose flour
- 1/2 cup unsweetened cocoa powder
- 1 teaspoon baking soda and 1/2 teaspoon salt
- 3 cups rolled oats
- Optional: 1 cup chocolate chips
Method
- Cream the butter and sugars until light, then beat in the eggs and vanilla.
- Whisk together the flour, cocoa, baking soda, and salt, and stir into the wet mixture.
- Fold in the oats and any chocolate chips.
- Scoop onto a lined sheet and bake at 350 F for 10 to 12 minutes, until set at the edges but soft in the center.
- Cool on the pan for 5 minutes before transferring to a rack.
Quick Oats Versus Rolled Oats
The type of oats you use changes the texture, so choose with the result in mind. Quick oats are smaller and softer, which makes them ideal for no-bake cookies because they absorb the warm syrup evenly and give a smoother, more uniform bite. Old-fashioned rolled oats are larger and chewier, and they shine in baked cookies where you want noticeable texture and a heartier chew.
You can use rolled oats in the no-bake version too, but the cookies will be chunkier and may need a few extra minutes to set. Avoid steel-cut oats in both recipes, since they stay hard and do not soften the way the dish needs. Baking references like King Arthur Baking explain how oat size affects absorption and texture in more detail.
Troubleshooting
| Problem | Cause | Fix |
|---|---|---|
| No-bakes will not set | Boiled too short | Next time boil the full 1 to 2 minutes; chill this batch to firm it |
| No-bakes are dry and crumbly | Boiled too long | Boil for less time and pull right at the 1-minute mark |
| Cookies too sweet | Sugar-forward recipe | Use dark cocoa and a pinch of salt to balance |
| Baked cookies spread flat | Butter too soft or dough warm | Chill the dough and check your oven temperature |
| Sticky in humid weather | Moisture in the air | Refrigerate no-bakes in summer to keep them firm |
Make Them Gluten-Free
Oats are naturally gluten-free, which makes these cookies easy to adapt, with one important caveat. Standard oats are often processed in facilities that also handle wheat, so they can be cross-contaminated with gluten. If you are cooking for someone with celiac disease or a gluten sensitivity, use oats specifically labeled certified gluten-free, a point the FDA’s guidance on gluten-free labeling reinforces. For the no-bake version, that single swap is usually all you need, since the other ingredients are naturally gluten-free. For the baked version, also replace the all-purpose flour with a cup-for-cup gluten-free blend.
Easy Variations
The base recipe welcomes additions, so make it your own:
- Different nut butter: Swap peanut butter for almond or sunflower seed butter, the latter being great for nut-free needs.
- Coconut: Stir a half cup of shredded coconut into the no-bake version for chew and flavor.
- Espresso boost: A teaspoon of espresso powder deepens the chocolate without adding coffee flavor.
- Dark cocoa: Use a darker cocoa powder for a richer, less sweet result.
- Add-ins for baked: Fold chocolate chips, dried cherries, or chopped nuts into the baked dough.
Storing Oats Cocoa Cookies
Both versions keep well with a little care. Store fully cooled cookies in an airtight container at room temperature for up to 5 days. No-bake cookies can soften and turn sticky in hot, humid weather, so refrigerate them in summer to keep them firm. For longer storage, freeze either version in a sealed container for up to three months and thaw at room temperature. Layer the cookies between sheets of parchment so they do not stick together, and they will taste freshly made whenever you reach for one. For more on keeping cookies at their best, see our guides on how to keep cookies soft and how to make chewy cookies.
No-Bake or Baked: Which Should You Make?
Both versions are delicious, so the right choice usually comes down to time, weather, and the texture you crave. The no-bake version wins on speed and convenience: it is ready in about half an hour, needs no oven, and is perfect for hot days or quick cravings. It delivers a dense, fudgy, almost candy-like chew that fans of the classic recipe love.
The baked version takes a little longer and turns on the oven, but it rewards you with a softer, more traditional cookie and a deeper, toasted chocolate flavor. It also holds its shape better for stacking and travels well. If you are baking for a bake sale or a lunchbox, the baked cookies are sturdier; if you want a fast, no-fuss treat, the no-bake version is hard to beat. Many people keep both in their rotation, reaching for one or the other depending on the day.
Serving and Pairing Ideas
Oats cocoa cookies are happiest with a cold glass of milk, which cuts the richness and plays up the chocolate. They also pair well with a hot cup of coffee, where the espresso notes echo the cocoa, or with a scoop of vanilla ice cream for an easy dessert. For gatherings, pile them on a platter alongside other cookies and bars so guests can mix and match. Crumbled over yogurt or ice cream, they add a chocolatey crunch, and the baked version makes a fine base for an ice cream sandwich. Because the flavor is rich but not fussy, these cookies fit casual snacks and party tables alike.
Make-Ahead and Scaling Up
Both recipes scale well when you need to feed a crowd. For the no-bake version, work in batches rather than doubling the pot at once, because a very large amount of syrup is harder to boil evenly and stir before it starts to set. Make one batch, drop the cookies, then start the next so each one sets at the right consistency.
The baked version doubles easily, and you can freeze the scooped dough balls to bake fresh later, adding a minute or two to the time. For the no-bake cookies, it is best to make them within a day or two of serving, since they are quickest and freshest when recently set, though they still freeze well if you need to get ahead. A little planning means you can have a chocolatey treat ready for any occasion.
A Few Healthier Swaps
If you want to lighten these up, a handful of small changes help without sacrificing the chocolate-and-oats appeal. Use a natural peanut butter with no added sugar, reduce the sugar slightly in the no-bake version, or choose a darker cocoa so a little goes a long way. Adding a spoonful of ground flaxseed or a handful of chopped nuts brings extra fiber and a heartier bite. None of these turn a cookie into health food, but they nudge the recipe in a more wholesome direction while keeping the comforting flavor that makes oats cocoa cookies a keeper.
Frequently Asked Questions
Why won’t my no-bake cookies set?
The most common cause is not boiling the mixture long enough. The sugar, butter, milk, and cocoa need a full rolling boil for 1 to 2 minutes, reaching about 225 F, to set up properly. If your batch stays gooey, pop it in the fridge to firm it, and next time boil for the full time using a timer.
Can I use rolled oats instead of quick oats?
Yes, but expect a chunkier, chewier cookie. Quick oats give no-bake cookies a smoother, more uniform texture because they absorb the warm syrup evenly, while rolled oats add more bite and may need a few extra minutes to set. Both work; it comes down to the texture you prefer. Avoid steel-cut oats, which stay too hard.
Are oats cocoa cookies gluten-free?
They can be. Oats are naturally gluten-free, but they are often cross-contaminated with wheat during processing, so use certified gluten-free oats if you need them to be safe for celiac disease. For the no-bake recipe, that is usually the only change required; for the baked recipe, also swap in a gluten-free flour blend.
How long do these cookies last?
Stored in an airtight container at room temperature, they keep for up to 5 days. In hot or humid weather, refrigerate the no-bake version so it stays firm. Both the baked and no-bake cookies freeze well for up to three months when sealed, with parchment between the layers to prevent sticking.
Can I make them without peanut butter?
Yes. Peanut butter adds richness and helps bind the no-bake cookies, but you can use almond butter or sunflower seed butter instead, which is ideal for nut-free needs. If you leave it out entirely, add a little extra butter so the cookies still hold together, and expect a slightly less rich result.
How many cookies does one batch make?
Each recipe makes roughly 30 cookies when you use about a tablespoon of dough or mixture per cookie. The exact number depends on how big you make them; smaller mounds give you more cookies and, for the baked version, a slightly shorter time in the oven.
Why are my no-bake cookies grainy?
A grainy texture usually means the sugar did not fully dissolve before the mixture came to a boil. Stir the sugar, butter, milk, and cocoa over medium heat until smooth before bringing it to a rolling boil, and avoid stirring too vigorously during the boil itself, which can encourage the sugar to crystallize.
Do I need to refrigerate no-bake cookies?
Not always, but it helps in warm weather. At cool room temperature, no-bake cookies hold their shape fine for a few days in an airtight container. In summer heat or humidity they can soften and turn sticky, so refrigerating them keeps them firm and sliceable. Let them sit at room temperature for a few minutes before serving so the chocolate is not too hard.
Can I add chocolate chips to the no-bake version?
You can, but add them carefully. Stir chocolate chips in last, after the mixture has cooled for a minute off the heat, so they soften and cling without fully melting into the batter. If you add them while the syrup is piping hot, they will melt and turn the cookies uniformly dark rather than leaving distinct chips.
What cocoa powder is best for these cookies?
Unsweetened natural cocoa powder is the standard choice and gives a classic, bright chocolate flavor. Dutch-process cocoa works too and gives a darker, smoother, less acidic result, which many people prefer in the baked version. For a richer, less sweet cookie, reach for a darker cocoa; for the familiar nostalgic taste, regular unsweetened cocoa is perfect.
Why These Cookies Are a Keeper
Part of the lasting appeal of oats cocoa cookies is how much they deliver for how little they ask. The ingredients are inexpensive pantry staples, the methods are forgiving, and the result tastes like the kind of treat someone made with care. The no-bake version in particular has a nostalgic quality, the sort of cookie that shows up at family potlucks and after-school snacks, and it introduces new bakers to stovetop candy-making without any special equipment.
The baked version, meanwhile, gives you a warm, chewy chocolate-oat cookie that fills the kitchen with the smell of baking. Both put oats and cocoa at the center, a pairing that balances hearty texture with rich chocolate, and both are easy enough to make on a whim yet good enough to bake on purpose.
The Bottom Line
Oats cocoa cookies give you two reliable paths to the same comforting flavor. For a fast, no-oven treat, the stovetop no-bake version sets in about half an hour, with that crucial 1-to-2-minute boil deciding the texture. For a soft, traditional cookie, the baked version delivers a chewy crumb and deep chocolate flavor in about 12 minutes at 350 F. Choose quick oats for smoothness or rolled oats for chew, use certified gluten-free oats if you need them, and store the cookies airtight for up to 5 days. Whichever way you make them, oats and cocoa are a combination that rarely lasts long on the plate. Keep the simple ingredients on hand and you can whip up a batch any time the craving hits, no special occasion required.